
LnRiLWdyaWQsLnRiLWdyaWQ+LmJsb2NrLWVkaXRvci1pbm5lci1ibG9ja3M++Knt3aWR0aDoxMDAlfS50Yi1ncmlkLWNvbHVtbi50Yi1ncmlkLWFsaWduLXRvcHt3aWR0aDoxMDAlO2Rpc3BsYXk6ZmxleDthbGlnbi1jb250ZW50OmZsZXgtc3RhcnR9LnRiLWdyaWQtY29sdW1uLnRiLWdyaWQtYWxpZ24tY2VudGVye3dpZHRoOjEwMCU7ZGlzcGxheTpmbGV4O2FsaWduLWNvbnRlbnQ6Y2VudGVyfS50Yi1ncmlkLWNvbHVtbi50Yi1ncmlkLWFsaWduLWJvdHRvbXt3aWR0aDoxMDAlO2Rpc3BsYXk6ZmxleDthbGlnbi1jb250ZW50OmZsZXgtZW5kfSB9IA==

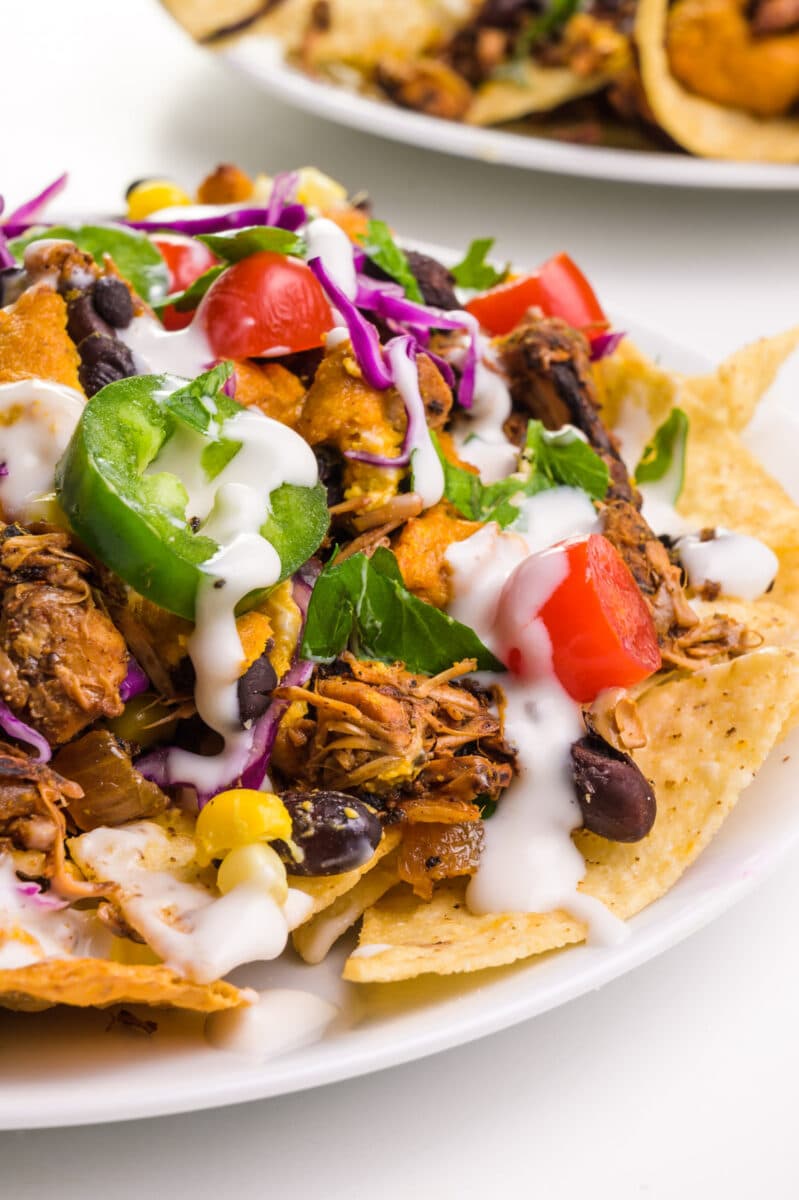
This jackfruit nachos recipe offers crispy nachos topped with spicy jackfruit carnitas, vegan nacho cheese, and even your favorite nacho toppings. It’s the perfect indulgence for Taco Tuesday or any night of the week.

Sometimes life offers deadlines, graduations, meetings, and just generally too much to do all in the same day. It’s enough to make a person want to kick back with some comfort food. That, my friends, is what these vegan jackfruit nachos are all about.
How to Make Jackfruit Nachos
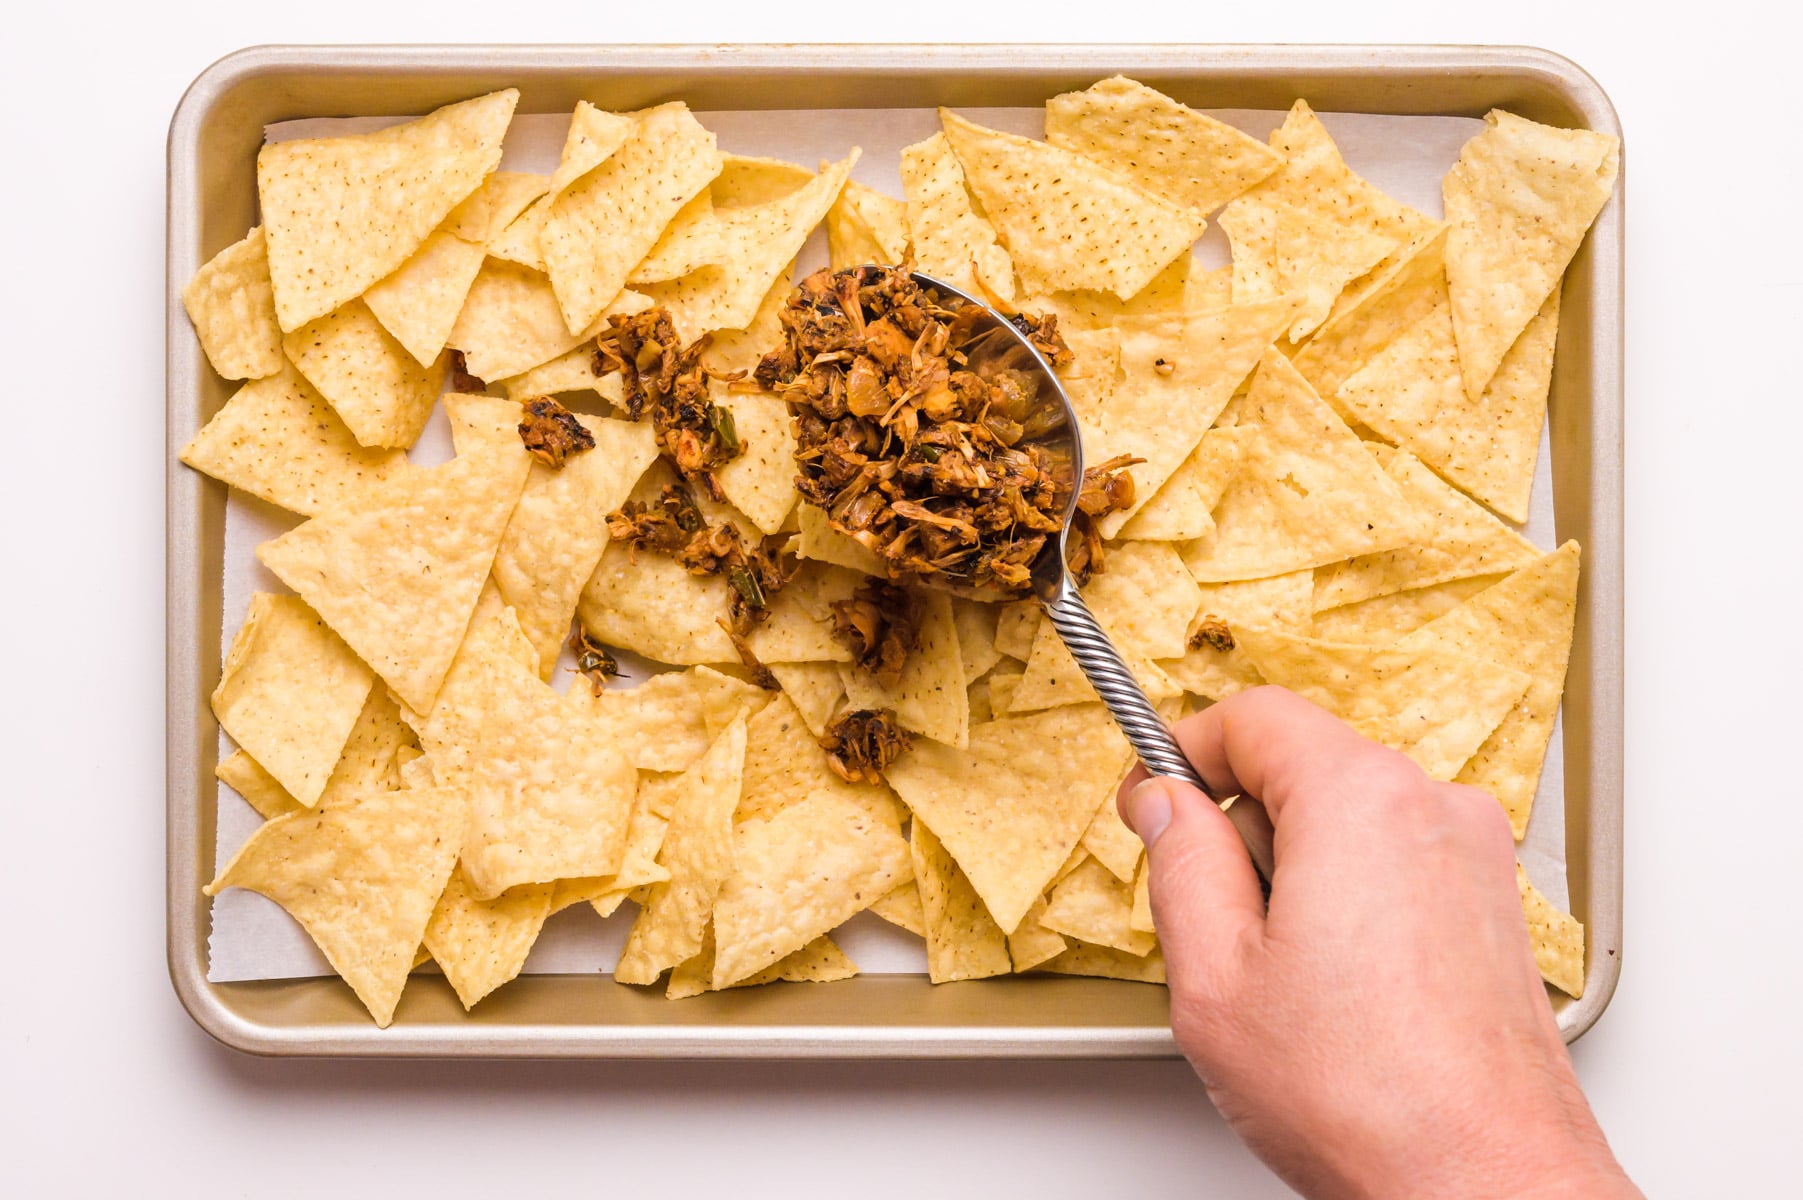
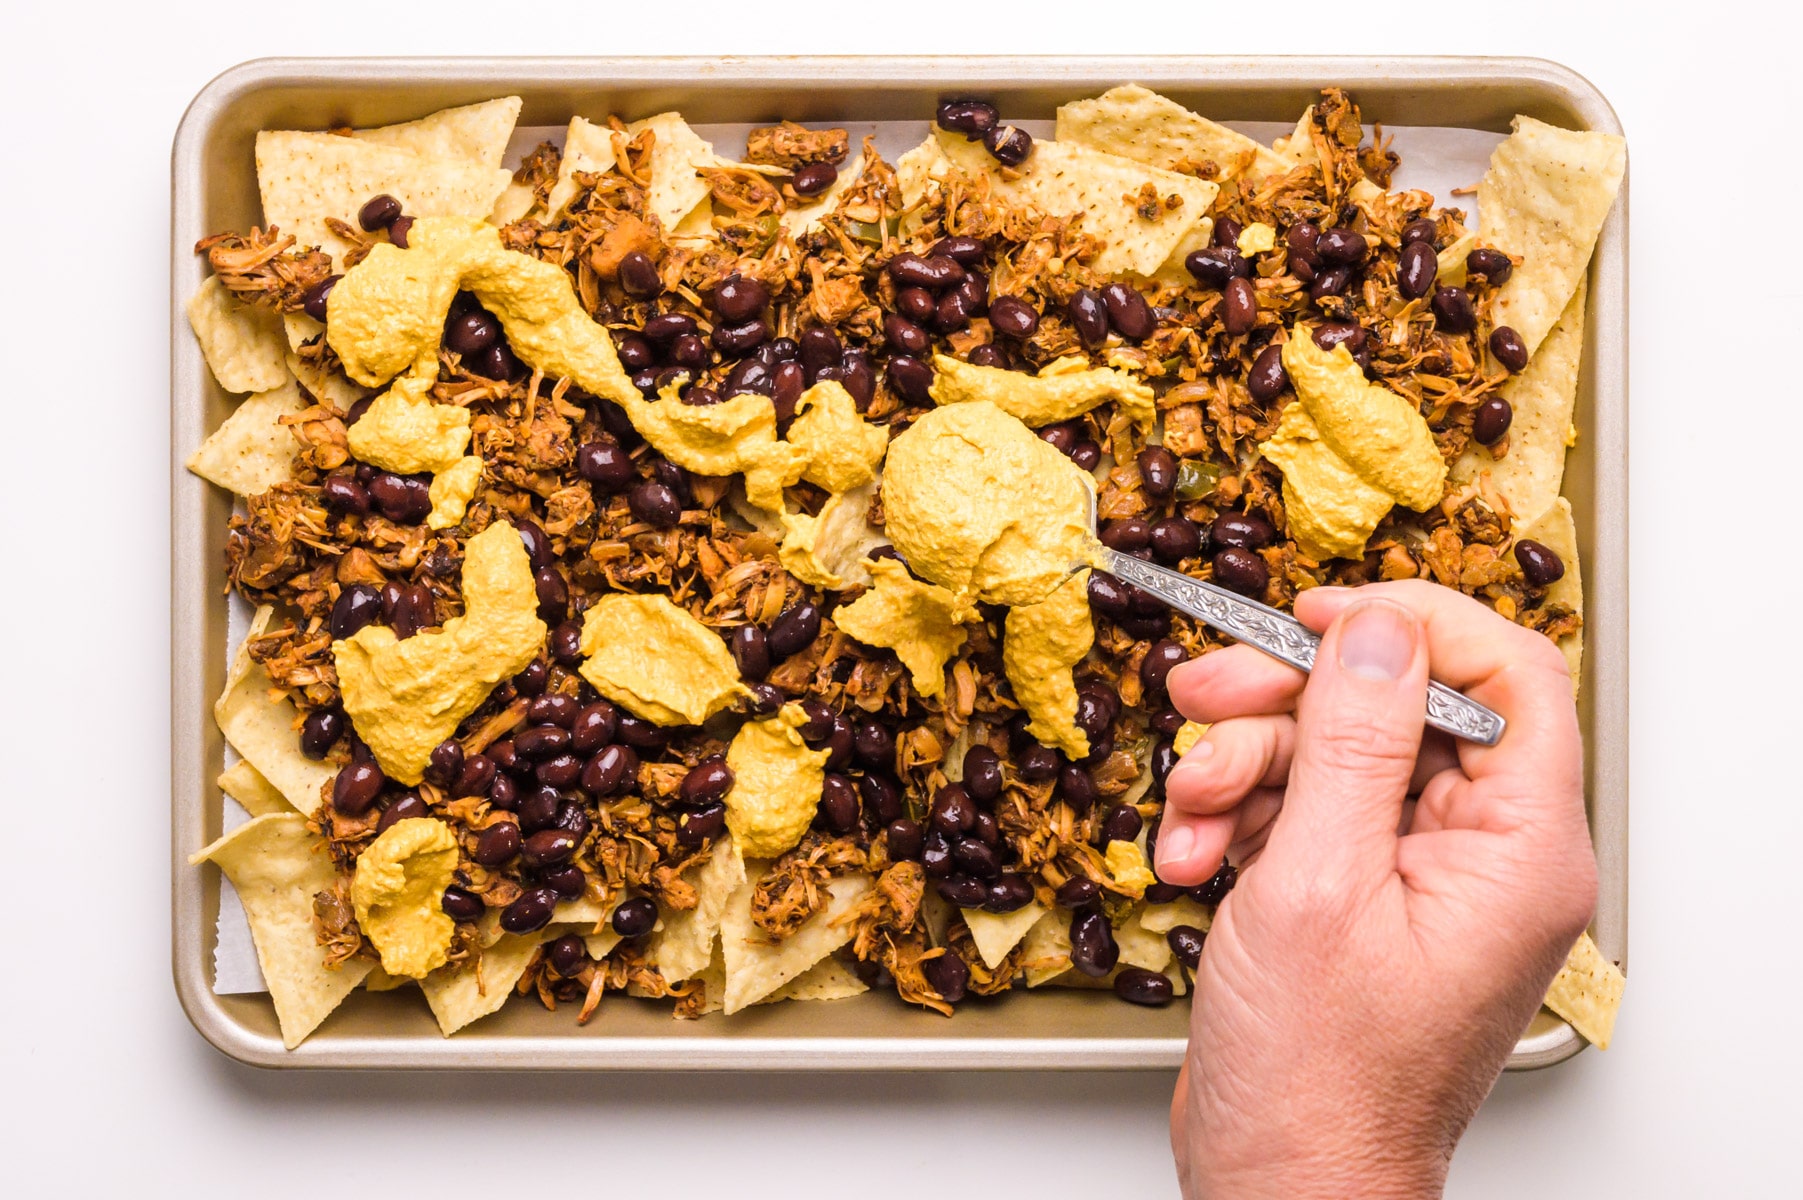
There are four easy steps to making these yummy vegan nachos:
- Spread tortilla chips in pan and top with jackfruit carnitas.
- Add the black beans and then distribute the vegan nacho cheese sauce.
- Bake until ingredients are heated through – about 10 minutes.
- Remove from oven and stir in sliced tomatoes, cherry tomatoes and vegan sour cream. add

Jackfruit taco meat
I’m using jackfruit carnitas as the main topping for these nachos. However, I have a few options you might consider, even barbecue. Trust me, BBQ nachos are smoky goodness in every bite!

Serving advice
Serve the jackfruit nachos with the following toppings:
Storage Tips
When it comes to storing nachos, it’s important to separate the wet toppings from the chips. This prevents the chips from getting too wet. Store wet toppings in a separate container. See post for reheating nachos. The toppings will keep in the fridge for 4 to 5 days.
Reheating nachos
After storage, tortilla chips will no longer be crisp. To get them crisp again, follow these steps:
- Preheat to 300°F/150°C. Line a baking sheet with parchment paper.
- Remove any cold or wet toppings from the chips.
- Add the tortilla chips to the pan in a single layer.
- Bake until crispy, about 10 minutes
- Remove from heat and add toppings.
Vegan taco favorites
If you like these jackfruit nachos, here are more plant-based taco favorites to keep you going:

Subscribe and get a free Easy Vegan Recipe eBook
Also our latest vegetarian recipes, delivered straight to your inbox!

Prevent your screen from going dark
-
Preheat oven to 375°F/190°C. Line a baking sheet with parchment paper or lightly coat with vegetable cooking spray.
-
Spread the tortilla chips in the pan. Top with cheese, carnitas, black beans, and corn.
-
Place the pan in the oven and bake until the ingredients are heated around 10 minutes.
-
Remove from oven and toss with sliced tomatoes, cherry tomatoes and vegan sour cream. add For presentation, adding a few sprigs of parsley or cilantro adds a nice finishing touch.
(The products above contain sponsored links to products we use and recommend)
Vegan cheese
Substitute 1½ cups of vegan cheddar cheese for the cashew nacho cheese.
Calories: 409kcal | Sugars: 108g | Protein: 15g | Fat: 48g | Saturated Fat: 9g | Sodium: 1051mg | Potassium: 663mg | Fiber: 13g | Sugar: 4g | Vitamin A: 275IU | Vitamin C: 17mg | Calcium: 242mg | Iron: 4.2mg
The nutritional information shown is an estimate provided by an online nutrition calculator and should not be considered a substitute for a professional nutritionist consultation.
This post was originally published in 2015 and was updated in 2022 to include new photos, new text, and an updated recipe.