
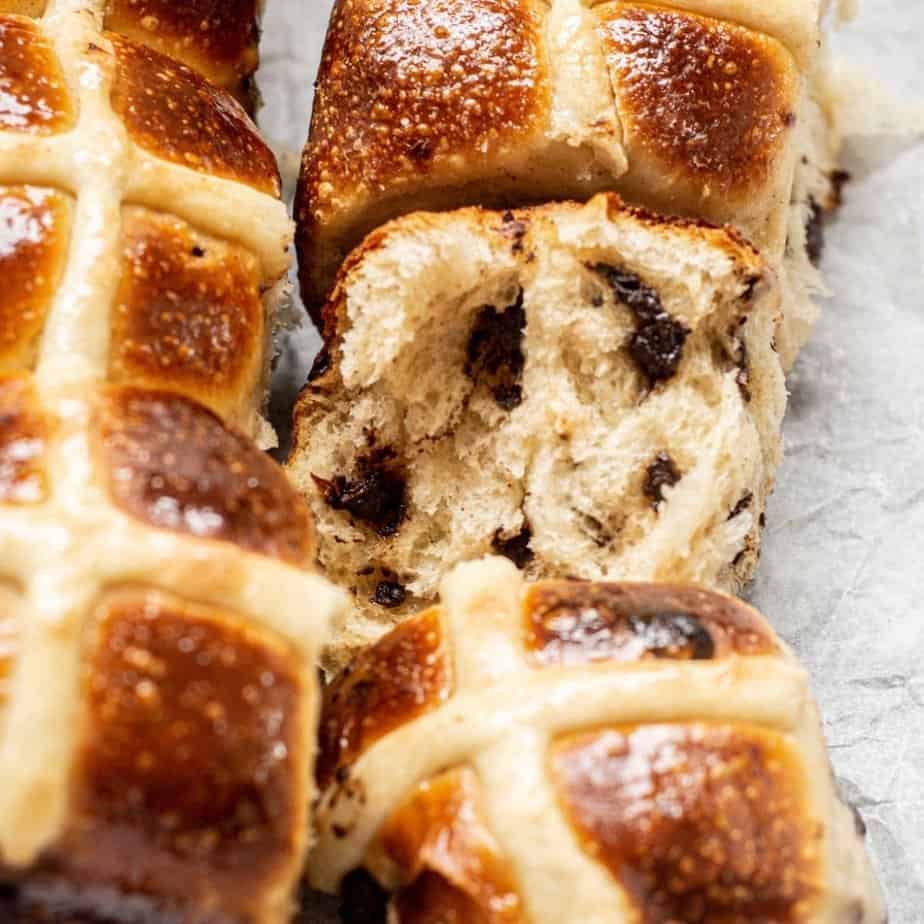
Fluffy sourdough chocolate chip hot cross buns. Gently spiced, filled with rich chocolate, and naturally leavened with sourdough.
These chocolate chip cross buns are a twist on a classic Easter recipe. It uses some of the spices of original hot cross buns but uses chocolate instead of fruit.
They are naturally leavened with a sourdough starter.

Jump to:
Sourdough hot cross buns
The base to this recipe is my traditional sourdough hot cross bun dough, with a few tweaks.
It keeps the spices (cinnamon, nutmeg, ginger, and cloves) but instead of raisins, I have used semi-sweet chocolate chips.
The dough is a fairly sticky dough so it’s the easiest when made in a mixer. However, it is absolutely possible by hand you just need patience and elbow grease.
The flour
Use a strong all-purpose flour, one with a protein level of at least 11%. The protein amount in all-purpose flour changes depending on the brand, and so does the name of the flour.
In NZ, flour with a protein of around 11% is a high-grade flour, while flour with a protein level of 10% is called plain flour. It’s best to just check the protein level rather than the name of the flour.

Baker’s schedule
Here is a rough baker’s schedule that outlines the timings for these spiced sourdough buns, including two options.
Evening before
Day 1
- 9 am – Mix the dough
- 9:30 am – Let it rise in a warm spot until bulked out by 40-50% (approx 4 hours depending on temperature)
- 1:30pm-8:30pm – Refrigerate the dough
- 8:30 pm – Shape the chocolate chip hot cross buns and let them rise overnight
Day 2
- 8 am – Pipe on the crosses and bake
Alternative timings
The above schedule is for overnight sourdough hot cross buns, where the buns will proof and rise overnight and be baked in the morning. Another option is to proof the bun dough in the fridge overnight on Day 1, then shape and rise them on Day 2 and bake in the afternoon.
After mixing the dough on Day 1 and giving it the initial rise, it can be placed in the refrigerator for up to 24 hours before shaping. This can give more flexibility in the timings but do bear in mind that the longer the fridge proof, the more the sourdough tang will come through.
On Day 2, shape the buns in the morning and let them rise for 5-8 hours in a warm spot until doubled in size. Pipe on the crosses, and bake.
The sourdough starter
The sourdough starter is fed overnight at a ratio of 1:3:3 (or even 1:4:4 if it’s going to be a warm night). This means a ratio of 1 part starter, 3 parts flour, and 3 parts water measured in weight.
This feeding amount means it will be ready to use within 8-10 hours, depending on the warmth of the room overnight. If I’m using it sooner, within say 6 hours, I would feed it 1:2:2.
If your starter is fairly young, it will help to keep it in a warm space overnight when feeding it at a higher ratio. A 1:3:3 feeding example would be 25g starter, 75g flour, and 75g water.
This makes approximately 175g starter, of which 150g will be used in the recipe. Any remaining starter can be fed and refrigerated for the next time you need it.
The method
With a mixer
In a bowl of a stand mixer fitted with a dough hook, combine all the dough ingredients except for the butter and chocolate chips.
Turn the mixer on medium and combine until it forms a thick but slightly sticky dough.
Add in the room temperature butter, a few cubes at a time, and keep mixing until the butter has been incorporated.
Keep it mixing until the sticky dough starts to strengthen and come together and pull away cleanly from the sides of the bowl. This can take around 15 minutes.
Once it seems mixed enough, let it sit for 5 minutes then take a small piece of dough and see if you can stretch it out really thin without it tearing right away. Proper gluten development will allow you to stretch the dough so thin you can almost see through it.
By hand
In a large bowl, combine all the dough ingredients except for the butter and chocolate chips. Use a wooden spoon, a fork, or your hands to combine everything into a shaggy dough.
Tip the dough out onto a clean bench and knead it for around 5 minutes until it becomes smooth. Knead in the room temperature butter, a cube at a time. This is going to make the dough very sticky.
For a wet dough like this using a slap and fold method is easiest – slap the dough down hard on the bench and then pull it forward quickly, and repeat. Using quick motions can stop the dough from sticking to your hands too much. It will be very sticky but do not be tempted to add more flour. After a while, you will start to feel strength gather in the dough.
It can be tiring so you can take breaks in between kneading, in fact, the dough will respond well to it. Come back to it with clean and slightly damp hands. Once it seems mixed enough, let it sit for 5 minutes then take a small piece of dough and see if you can stretch it out really thin without it tearing right away. Proper gluten development will allow you to stretch the dough so thin you can almost see through it.
Adding the chocolate chips
Once the dough has been kneaded, flatten it out and spread the chocolate chips on top. Fold the dough around the chocolate chips and then gently knead it on the bench to disperse the chocolate through the dough.

Proofing
Form the dough into a ball. Place the dough ball into a clean bowl and cover it with a lid or plate, or a damp tea towel. Let it proof in a warm spot ideally around 25°C / 76°F and let it rise. It won’t double but should bulk out by 40-50%. This can take around 4-6 hours depending on temperature.
Once proofed, place the covered dough in the refrigerator for at least 5 hours.

Shaping
Pull the dough from the bowl onto a lightly floured bench and cut it into 9 or 12 even-sized pieces. Form each piece into a tight ball.
Place the balls, and seam side down into a parchment paper-lined dish. I make 9 and use a 10x10inch/25x25cm square dish. You could also use a 9 x13 inch dish.
Cover the dish with a dampened tea towel, plastic wrap, or a lid and let them rise overnight until doubled.

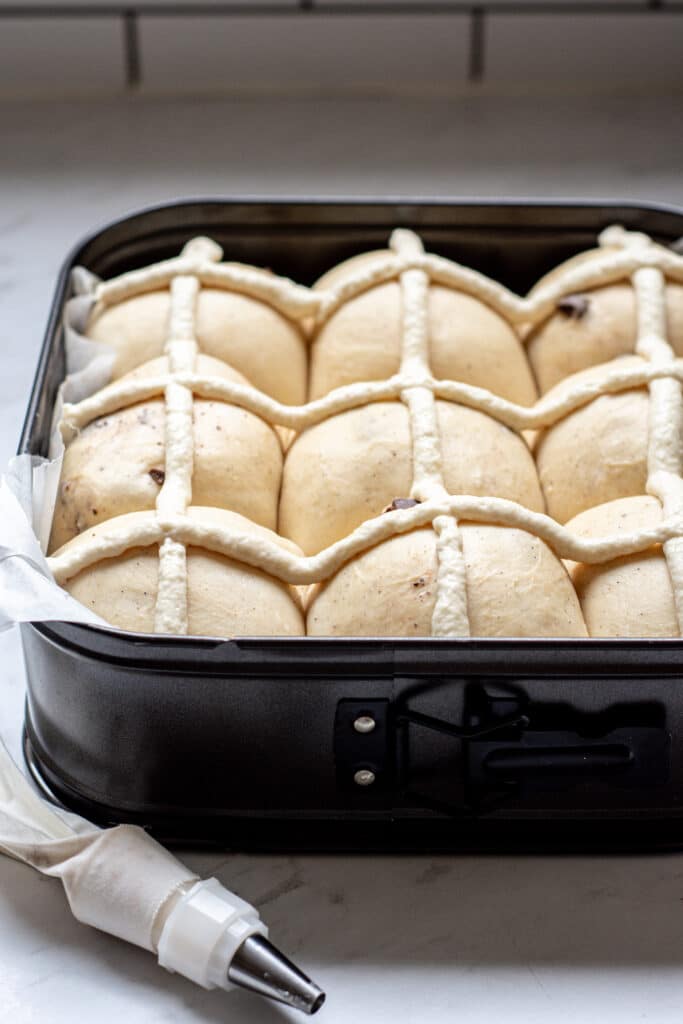
Crosses
Mix together the mixture for the crosses, and pipe crosses over the buns using a piping bag fitted with a small round tip.
Bake the buns for around 25 minutes until deeply browned. If the buns are browning too quickly, you can place a sheet of aluminum foil over top.
Once they come from the oven, brush them immediately with a sugar glaze.
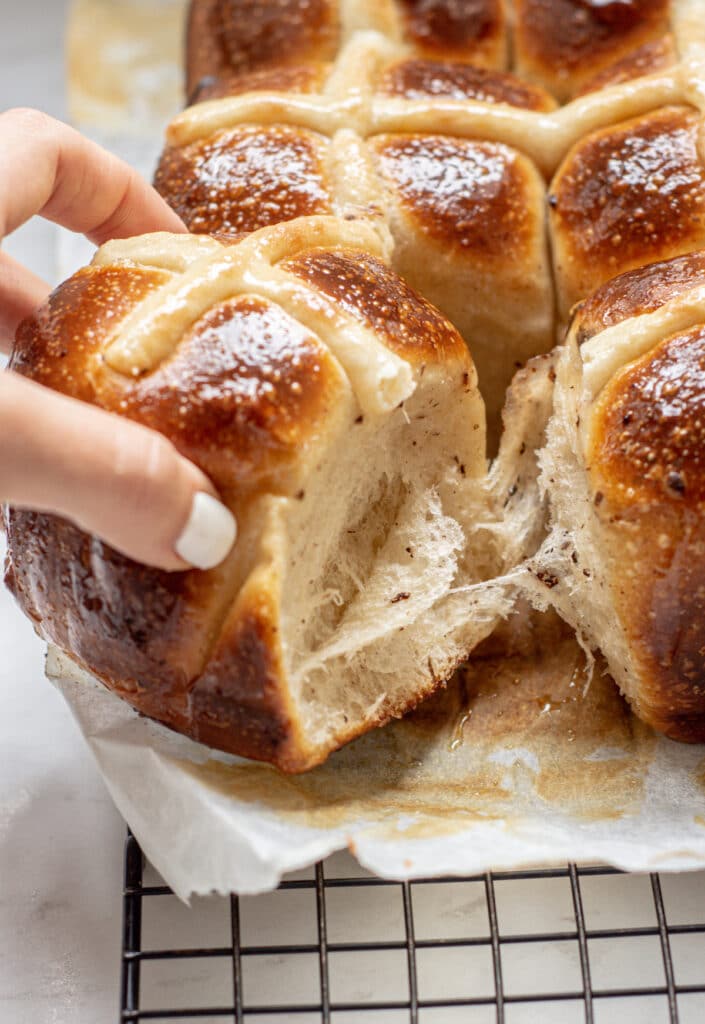
Storing
Hot cross buns are most delicious when served fresh on the day. Leftover sourdough chocolate chip hot cross buns can be covered and stored at room temperature for up to three days.
Alternatively, they can also be frozen for up to three months.
Other hot cross buns
Try these
Full Recipe

Sourdough Chocolate Chip Hot Cross Buns
Yield:
9
Prep Time:
40 minutes
Cook Time:
25 minutes
Additional Time:
12 hours
Total Time:
13 hours 5 minutes
Fluffy sourdough chocolate chip hot cross buns. Gently spiced, filled with rich chocolate, and naturally leavened with sourdough.
Ingredients
Starter. This makes approx 175g starter in total. 150g will be used in the recipe
- 25g sourdough starter*
- 75g all-purpose flour
- 75g water
Dough
- 450g all-purpose or bread flour (with a protein level of at least 11%)
- 100g granulated sugar
- 2 teaspoons ground cinnamon
- 1 teaspoon vanilla extract or paste
- ½ teaspoon salt
- ½ teaspoon ground ginger
- ¼ teaspoon ground nutmeg
- ¼ teaspoon ground cloves
- 220g milk
- 1 large egg
- 150g active sourdough starter
- 60g room temperature butter, cubed.
- 150g semi-sweet chocolate chips
Crosses
- 50g all-purpose flour
- 50g water
Sugar Glaze
- 50g granulated sugar
- 2-3 tablespoon boiled water
Instructions
The night before
- Combine the starter ingredients in a bowl. Mix well. Tip it into a clean jar. Leave it on the bench to rise and cover the jar with a tea towel or loosely balanced lid.
With a mixer
- The following day, in a bowl of a stand mixer fitted with a dough hook, combine all the dough ingredients except for the butter and chocolate chips.
- Turn the mixer on medium and combine until it forms a thick but slightly sticky dough.
- Add in the room temperature butter, a few cubes at a time, and keep mixing until the butter has been incorporated.
- Keep it mixing until the sticky dough starts to strengthen and come together and pull away cleanly from the sides of the bowl. This can take around 15 minutes.
- Once it seems mixed enough, let it sit for 5 minutes then take a small piece of dough and see if you can stretch it out really thin without it tearing right away. Proper gluten development will allow you to stretch the dough so thin you can almost see through it.
- Once the dough has been kneaded, flatten it out and spread the chocolate chips on top. Fold the dough around the chocolate chips and then gently knead it on the bench to disperse the chocolate through the dough.
Without a mixer
- In a large bowl, combine all the dough ingredients except for the butter and chocolate chips. Use a wooden spoon, a fork, or your hands to combine everything into a shaggy dough.
- Tip the dough out onto a clean bench and knead it for around 5 minutes until it becomes smooth. Knead in the room temperature butter, a cube at a time. This is going to make the dough very sticky.
- For a wet dough like this using a slap and fold method is easiest – slap the dough down hard on the bench and then pull it forward quickly, and repeat. Using quick motions can stop the dough from sticking to your hands too much. It will be very sticky but do not be tempted to add more flour. After a while, you will start to feel strength gather in the dough.
- It can be tiring so you can take breaks in between kneading, in fact, the dough will respond well to it. Come back to it with clean and slightly damp hands. Once kneaded, work in the chocolate chips.
Proofing
- Form the dough into a ball. Place the dough ball into a clean bowl and cover it with a lid or plate, or a damp tea towel. Let it proof in a warm spot ideally around 25°C / 76°F and let it rise. It won’t double but should bulk out by 40-50%. This can take around 4-6 hours depending on temperature.
- Once proofed, place the covered dough in the refrigerator for at least 5 hours.**
Shaping
- Line a 9x13inch or 10x10inch baking dish with parchment paper.
- Pull the dough from the bowl onto a lightly floured bench and cut it into 9 or 12 even-sized pieces. Form each piece into a tight ball.
- Place the balls, seam side down into the dish.
- Cover the dish with a dampened tea towel, plastic wrap, or a lid and let them rise overnight until doubled.
Baking
- Preheat the oven to 200 °C / 392F standard oven or 180 °C / 356 F fan-bake.
- Mix together the mixture for the crosses, and pipe crosses over the buns using a piping bag fitted with a small round tip. Bake the buns for around 25-27 minutes until deeply browned. If the buns are browning too much, you can place a sheet of aluminum foil over top.
- While the buns are baking, mix together the glaze ingredients until the sugar dissolves. Bush the hot bun tops with the sugar glaze once they come from the oven. Leave the buns to cool for about 20 minutes before eating.
Notes
*if your overnight temperatures are very warm, you can decrease the starter amount to 18g, with 75g flour and 75g water,
**The above schedule is for overnight sourdough hot cross buns, where the buns will proof and rise overnight and be baked in the morning. Another option is to proof the bun dough in the fridge overnight on Day 1, then shape and rise them on Day 2 and bake in the afternoon.
After mixing the dough on Day 1 and giving it the initial rise, it can be placed in the refrigerator for up to 24 hours before shaping. This can give more flexibility in the timings but do bear in mind that the longer the fridge proof, the more the sourdough tang will come through.
On Day 2, shape the buns in the morning and let them rise for 5-8 hours in a warm spot until doubled in size. Pipe on the crosses, and bake.
Nutrition Information:
Yield: 9
Serving Size: 1
Amount Per Serving:
Calories: 413Total Fat: 13gSaturated Fat: 7gTrans Fat: 0gUnsaturated Fat: 5gCholesterol: 37mgSodium: 185mgCarbohydrates: 83gFiber: 4gSugar: 27gProtein: 11g