
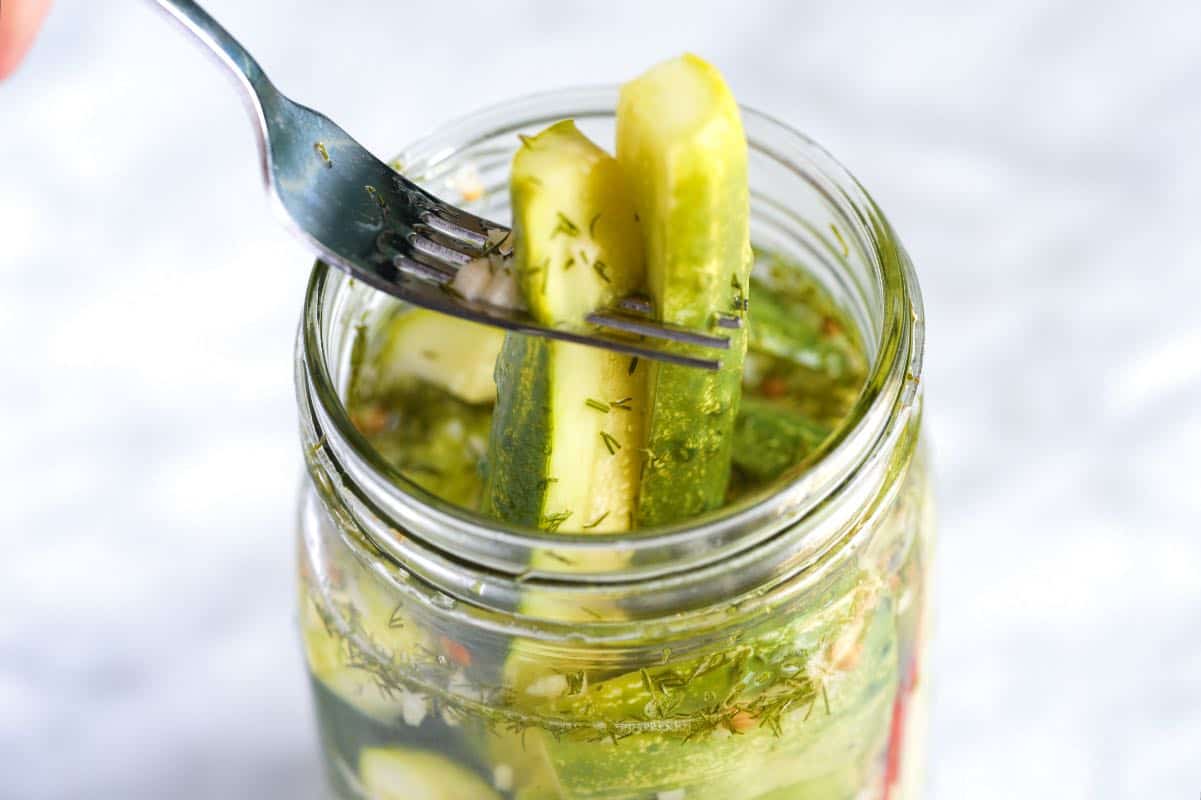
Making homemade pickles is incredibly easy. Our recipe yields crisp, flavorful cucumber pickles that beat what you can find at the grocery store. The best part is you can enjoy them in just one day! We absolutely adore this pickles recipe and think you will too!
Related: We also love these quick pickled red onions.
How to Make Quick Pickles
Just like our homemade pickled beets, these pickles are of the refrigerator variety and require just two simple steps:
- Slice the cucumbers into spears, and place them in a bowl with salt, whole black peppercorns, fresh dill, garlic, and an optional arbol chili pepper. Allow them to sit for 30 minutes, then pack the mixture into a jar.
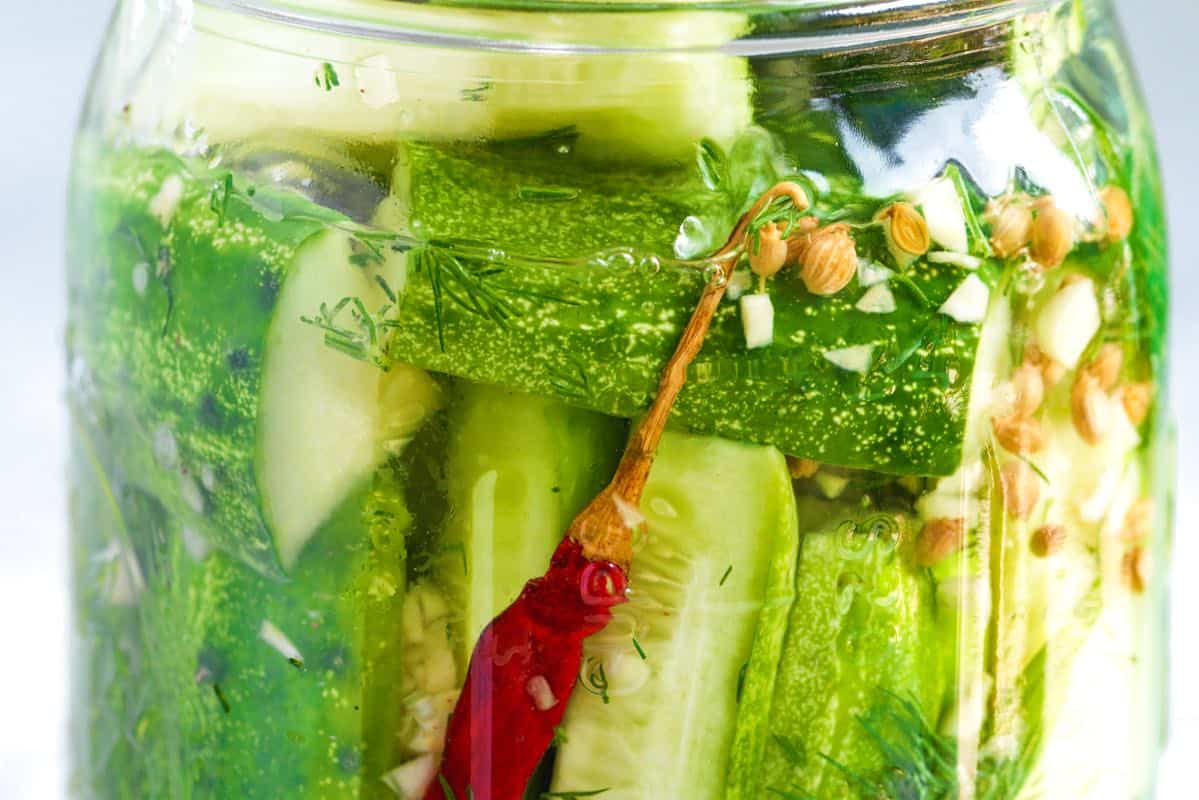
- Cover the cucumbers in the jar with our simple vinegar brine (see below for tips on using it hot or cold).
After that, simply refrigerate the jar and enjoy your delicious homemade refrigerator pickles!
Our family loves dill pickles, so this pickle recipe includes a generous amount of fresh dill in the jar. We also love the flavor of fresh garlic, so we include garlic. You have two options to customize its intensity: For a robust garlic kick, mince the garlic before adding it to the jar, whereas for a milder garlic flavor, you can use whole peeled cloves. Of course, if you prefer pickles without garlic or dill, feel free to omit them.
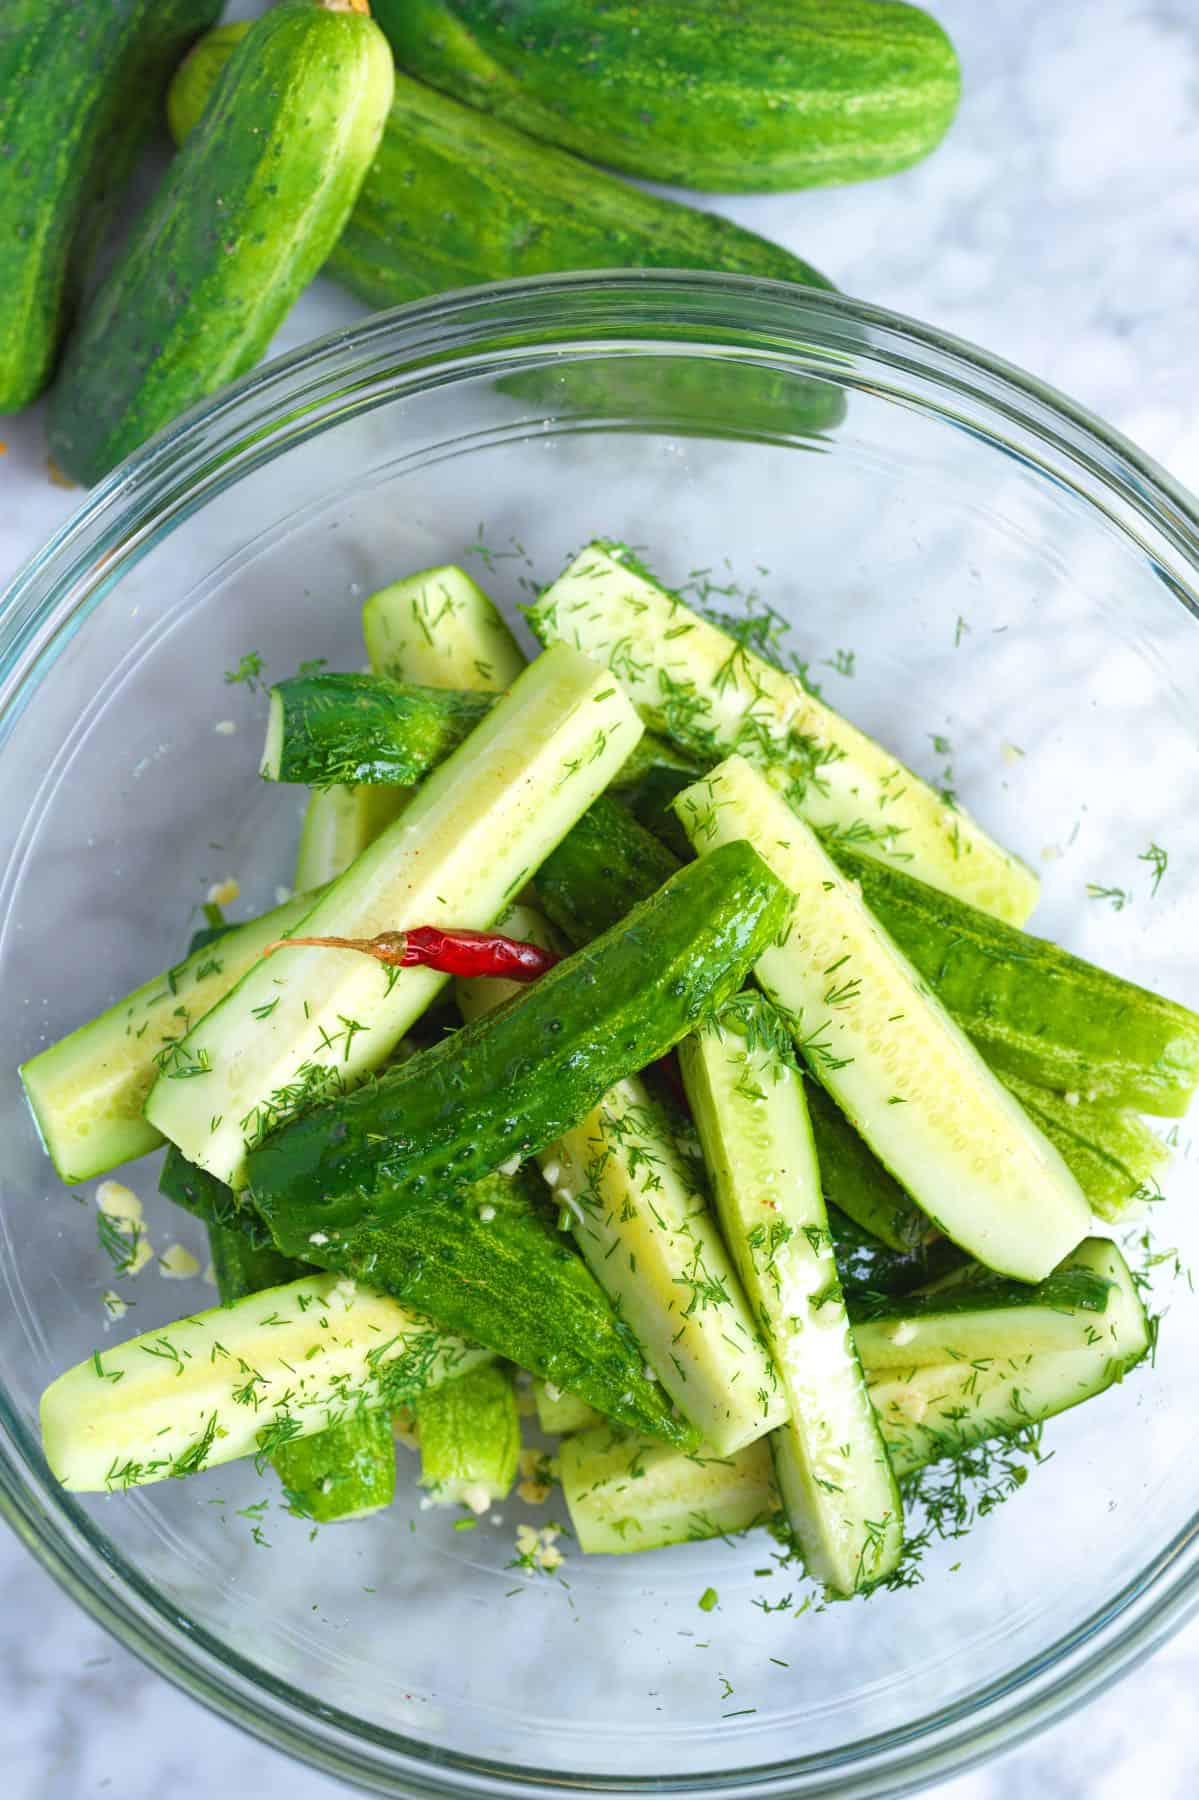
We include one dried Arbol chili pepper in the jar to give the brine a slightly spicy twist. Don’t worry; it won’t make the cucumbers excessively spicy. For those who prefer spicy pickles, add more chili peppers (2 to 3) or 1/2 teaspoon or more of crushed red pepper flakes.
Cucumber Pickles: Cold Brine vs. Hot Brine
In a small saucepan, combine distilled white vinegar with water, salt, a little bit of sugar (1 teaspoon), and classic pickle spices to create the pickle brine. We use mustard seeds, coriander seeds, peppercorns, and dill seeds (which are optional). Heat the mixture over medium heat until the salt and sugar fully dissolve.
Now, depending on the type of cucumber pickles you prefer, you have two options:
Option 1: For hot-brined pickles, immediately pour the hot brine over the cucumbers. These pickles will be slightly softer with a dulled green color but retain a classic homemade pickle crunch. The great thing about hot-brined pickles is that you can enjoy them as early as two hours after making them. Although they are best the next day, they are the perfect choice if you are in a time crunch.
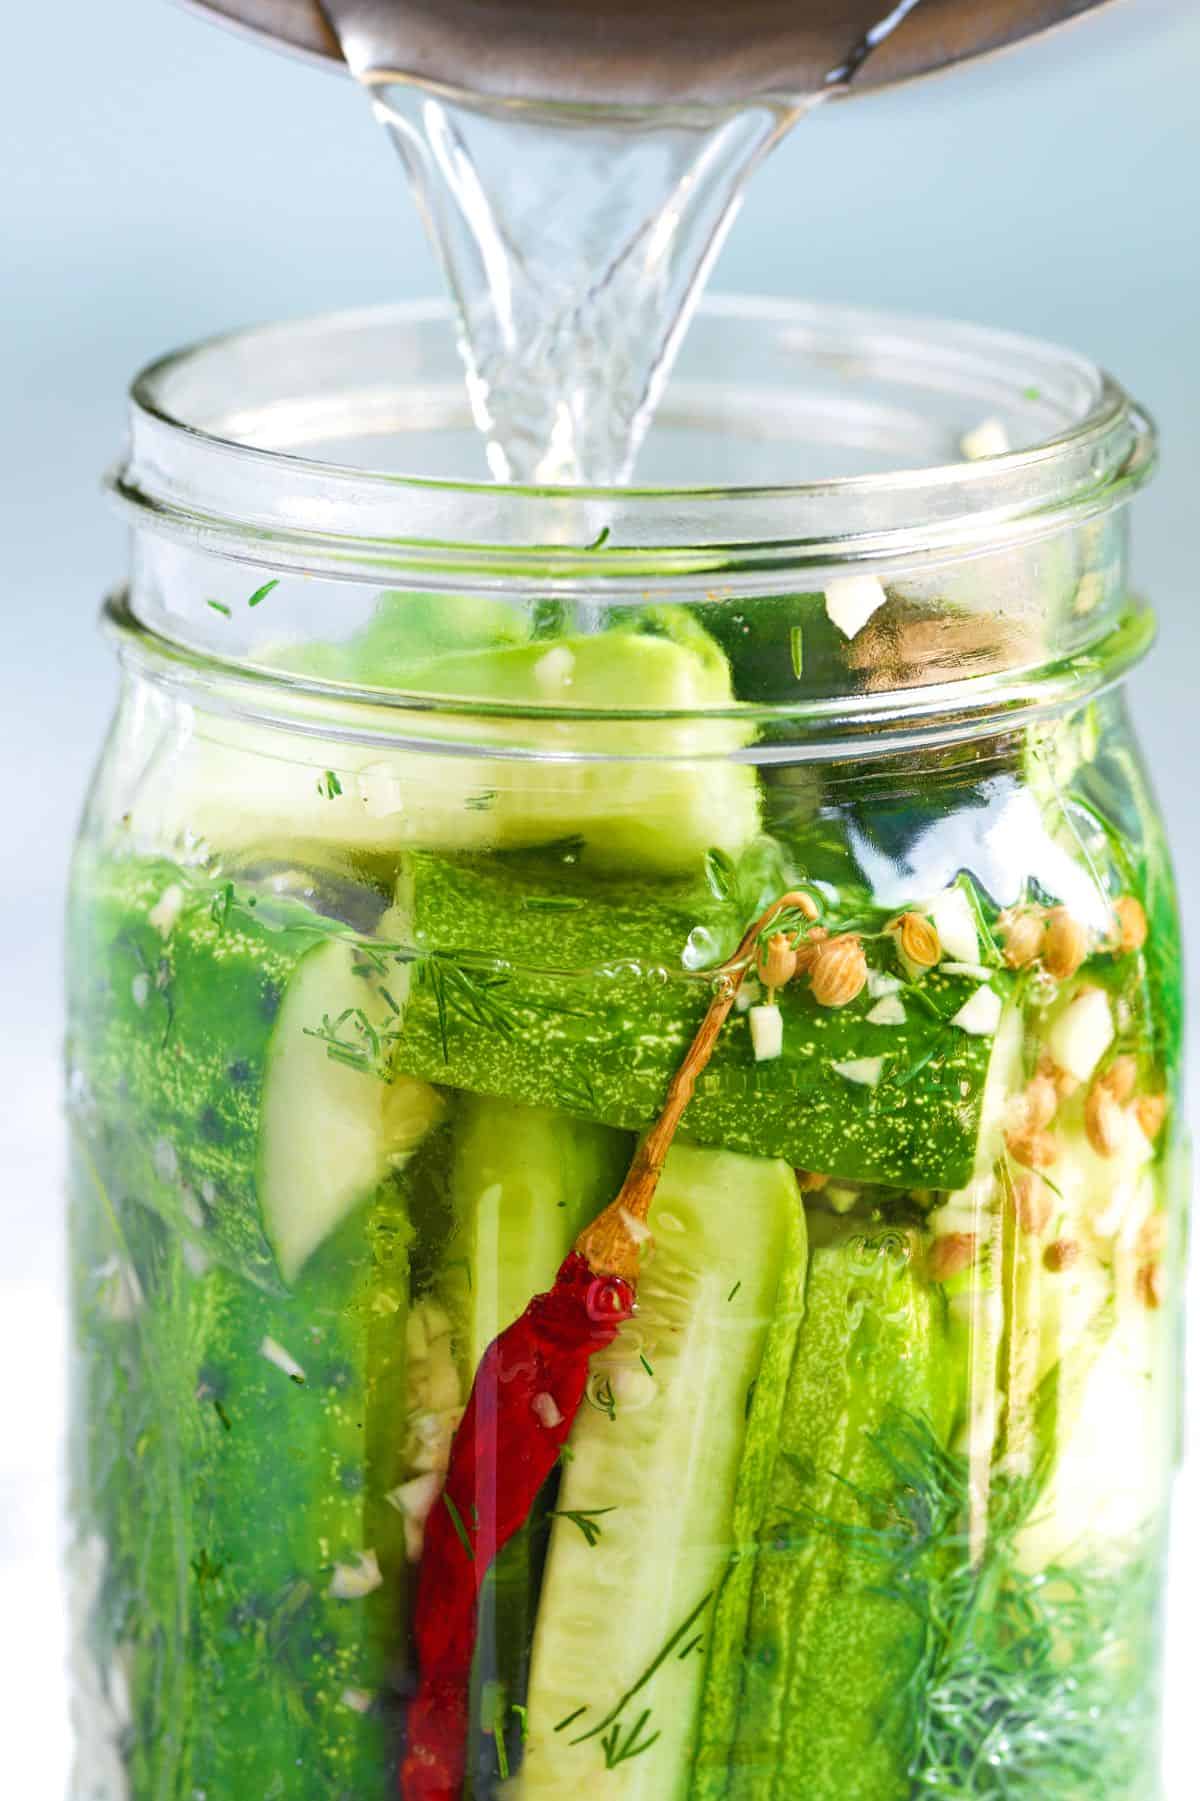
Option 2: If you prefer cold-brined pickles, let the brine cool first, then pour it over the cucumbers. Cold-brined pickles retain their crunch and vibrant color, similar to deli-style pickles. Since the brine starts cold, the pickling process takes longer. Expect your pickles to be ready in 3 to 5 days. The fresh crunch and vivid color of cold-brined pickles make them a favorite in our family.
Best Varieties of Cucumbers For Pickling
The best varieties of cucumbers for pickling are those like Kirby cucumbers, which are short, fat, and have bumpy skin. Kirby cucumbers, Boston pickling cucumbers, and other pickling-specific varieties are ideal choices because they hold up well in the brine and retain their crispness, resulting in delicious cucumber pickles. However, if you don’t have access to a garden, farmer’s market, or farm, a good alternative is to use smaller Persian cucumbers instead.
These refrigerator garlic and dill pickles have been created in collaboration with our friend and chef, Richard Hattaway. He helped us dial in the recipe and has truly created our family’s go-to pickles! We hope that you try them soon.
Our Favorite Dill Pickles
-
PREP
-
COOK
-
TOTAL
Making our homemade dill pickles is incredibly easy, and the result is crispy and full of flavor, far surpassing store-bought pickles. You have two options based on your preference: hot-brined or cold-brined pickles. Hot-brined pickles are ready within a day, offering a quicker option, while cold-brined pickles take 3 to 5 days to be ready. However, the cold-brined pickles have the advantage of being crisper and retaining a vibrant green color. For a more detailed comparison, please refer to the article above.
1-quart (1 liter) jar
You Will Need
1 pound 5 ounces (600 grams) pickling cucumbers like Kirby, 6 medium
5 cloves garlic
4 sprigs fresh dill
1 dried arbol chili pepper, optional
4 whole peppercorns
1 cup (236 ml) white vinegar (5% acidity)
1/2 cup (118 ml) water
2 teaspoons (12 grams) fine sea salt, plus 1/4 teaspoon (1.5 grams) for brine
1 teaspoon sugar
1/4 teaspoon yellow mustard seeds
1/4 teaspoon whole coriander seeds
1/4 teaspoon dill seeds, optional
Directions
1Prepare the cucumbers, garlic, and dill. Cut the ends off the cucumbers and cut them into spears lengthwise (I typically get 6 spears per cucumber). For garlicky pickles, mince the garlic. For a milder garlic flavor, leave the garlic cloves peeled and whole. Chop half of the dill and keep the rest as whole sprigs.
2In a large bowl, toss the cucumbers with 2 teaspoons of salt, peppercorns, garlic, chopped dill, and optional arbol chili pepper. Let them sit for 30 minutes.
3Pack the cucumbers tightly into a 1-quart (1 liter) jar. If some cucumbers don’t fit, cut them in half and place them on top of the packed spears. Scrape all the dill, garlic, and salt from the bowl into the jar. Slide the chili and whole dill sprigs down the side of the jar.
4In a small saucepan, bring vinegar, water, 1/4 teaspoon salt, 1 teaspoon sugar, mustard seeds, coriander seeds, and dill seeds to a boil.
5If you’re making hot-brined pickles, immediately pour the hot brine over the cucumbers to fully submerge them. Leave about 1/8-inch of space between the top of the brine and the jar lid. Let the jar cool to room temperature, then tighten the lid finger tight and refrigerate.
6If you prefer cold-brined pickles, allow the brine to cool to room temperature before pouring it over the cucumbers to fully submerge them. Leave about 1/8-inch of space between the top of the brine and the jar lid. Tighten the lid finger tight and refrigerate.
7For the first night, place the jar upside down in a bowl, then turn it right-side-up the next day. Hot-brined pickles will be ready the next day, while cold-brined pickles need 3 to 5 days before they’re ready to enjoy. The pickles will last in the fridge for up to one month.
Adam and Joanne’s Tips
- Cucumbers: The best cucumbers for pickling are Kirby, Boston pickling, and other pickling-specific varieties. They are short, fat, and have bumpy skin, making them perfect for brining while retaining their crispness. Smaller Persian cucumbers are a good alternative.
- Dill seeds are classic in pickling recipes. They are not the same as dried dill weed.
- Nutrition facts: The nutrition facts provided below are estimates. We have used the USDA database to calculate approximate values. It is difficult to calculate how much salt is in the pickle spears, so we have included all of the brine in the calculations.
If you make this recipe, snap a photo and hashtag it #inspiredtaste — We love to see your creations on Instagram and Facebook! Find us: @inspiredtaste
Nutrition Per Serving
Serving Size
2 spears (assuming 36 total)
/
Calories
12
/
Total Fat
0.1g
/
Saturated Fat
0g
/
Cholesterol
0mg
/
Sodium
292.7mg
/
Carbohydrate
2.2g
/
Dietary Fiber
0.3g
/
Total Sugars
0.9g
/
Protein
0.4g