

This Death By Chocolate Drip Cake is a chocolate lovers’ dream! Not overly sweet, rich, decadent and absolutely delicious!
This post is sponsored by Imperial Sugar. All thoughts and opinions are 100% my own.

Click HERE to get the FULL recipe
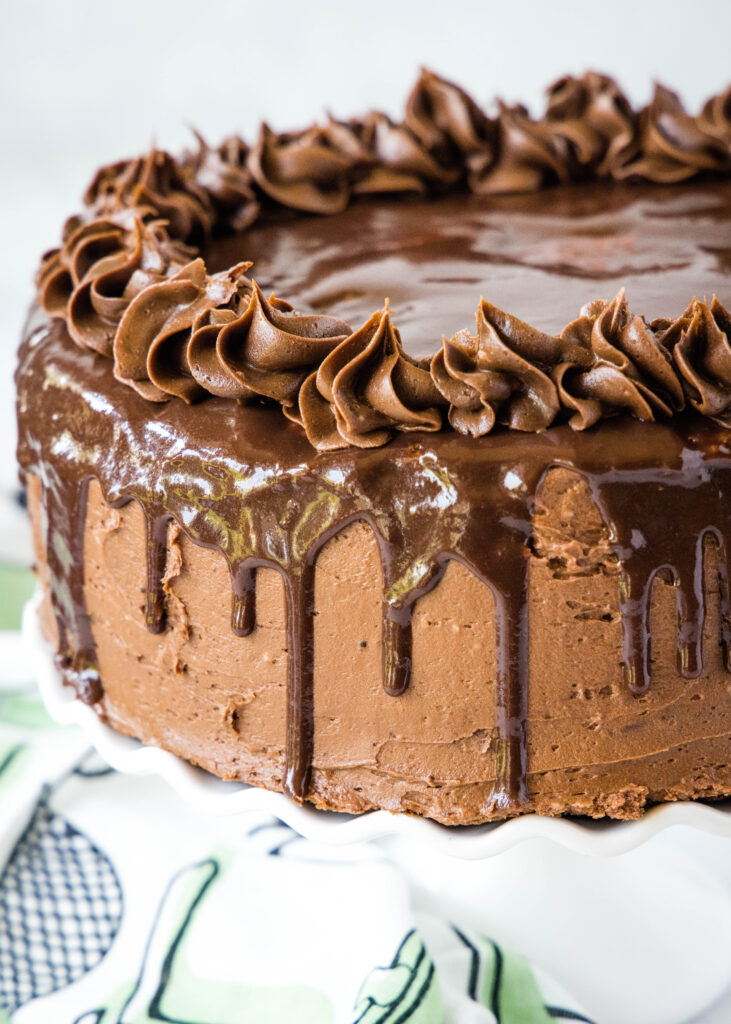
Chocolate lovers’, this is for you! A moist, tender and delicious chocolate cake, topped with chocolate frosting, and to make it extra special a chocolate ganache dripping down the sides! And don’t forget the chocolate swirls on top as well. If this isn’t the definition of Death by Chocolate Cake I don’t know what is!
Death By Chocolate Pie was a huge hit with the chocolate crowd, I just had to do a cake version. And it exceeded all of my expectations!
Why You’ll Love This Death By Chocolate Cake
- Chocolate-y – obviously this is reserved for those that like chocolate, but if you are a fan, this is definitely made for you!
- Not Too Sweet – from the looks of it you would think this is going to be “make your teeth hurt” sweet, but it is balanced and not too sweet. It is chocolate, so obviously it is sweet, but not over the top.
- Pretty – that chocolate ganache dripping down the sides along with the chocolate swirls on the top make this a show stopping dessert.
What You’ll Need
Click HERE to get the FULL PRINTABLE RECIPE
Chocolate Cake
- All-Purpose Flour
- Cocoa Powder – unsweetened cocoa powder
- Baking Soda
- Baking Powder
- Salt
- Sour Cream
- White Sugar
- Eggs
- Vegetable Oil
- Vanilla Extract
- Hot Water
Chocolate Frosting
- Butter – I always use unsalted in all of my baking
- Powdered Sugar
- Cocoa Powder
- Vanilla Extract
- Milk
Chocolate Ganache Drips
- Heavy Cream
- Semi-Sweet Chocolate Chips
How To Make Death By Chocolate Cake
- Make Cake. Whisk together all of the dry ingredients in a bowl. Whisk together all of the wet ingredients in a bowl, and slowly mix them together. Pour into 3 8-inch cake pans and bake until they are cooked through.
- Make Frosting. Using a stand mixer or hand held mixer cream butter until smooth. Add in powdered sugar and cocoa powder and mix until crumbly and combined. Add vanilla extract and milk, and beat until smooth and a spreadable consistency.
- Assemble Cake. Place the first layer of cake on a serving platter or large plate. Reserve about 3/4 cup of frosting for the swirls on top. Top with about 1/4 of the frosting. Repeat with the remaining layers, using an offset spatula to coat the top and sides completely in frosting.
- Ganache. Pour heavy cream in a microwave safe liquid measuring cup and heat in the microwave for 35 seconds. Remove and add the chocolate chips. Let it stand for about a minute. Stir until smooth. Let it set up for 1-2 minutes until it starts to thicken and won’t make a mess on your cake. Start by slowly pouring a little bit of the ganache along the edge of the cake all the way around, letting it drip down the edges. Pour the remaining ganache in the center of the cake, and use a spatula to gently spread over the top, and push just a little over the edge if you want more drips.
- Chill. Place the cake in the fridge and let it set up for an hour before decorating the top.
- Decorate. Add the reserved chocolate to a piping bag with a swirl tip (I used Wilton 1M), and pipe swirls along the edge around the cake.
Recipe Tips & Substitutions
- Sour Cream. This recipe calls for sour cream as it makes for a moist and tender cake that is sturdy enough for 3 layers and all the frosting. If you don’t want to use sour cream, you can use 1 cup of buttermilk or even plain yogurt will work.
- Cocoa Powder. I like to use Dutch Processed Cocoa Powder in baking, I think it gives it a rich flavor. That being said, you can use any unsweetened cocoa powder and your cake will turn out great.
- Vegetable Oil. This is a neutral flavored oil, so it doesn’t affect the taste of the cake. I do not advise using olive oil or melted butter, as it changes the taste. But you could use avocado oil, if you wanted a swap.
- Do Not Overmix. When making your cake, be sure to follow the directions for combining the wet and dry ingredients separately. You want to mix them together as little as possible. The more you mix, the more you start to develop the glutens in the flour, and this will lead to a tougher cake.
Making Death By Chocolate Cake Ahead
This is a great cake to make ahead or even make in stages to cut down on the amount of work you have to do at one time!
- Make your cake ahead of time. You can make your cake, let it cool completely, then wrap tightly in plastic wrap and freeze it. I prefer to bake it the day. I cover the layers with plastic wrap or foil to keep them air tight, so they don’t dry out and let them stay at room temperature.
- Make frosting ahead of time. You can make the frosting a few days ahead of time, or it freeze well. If you make it ahead, just stir it well and make sure it is at room temperature when you start to frost the cakes.
- Store in fridge. The cake will last in the fridge, if you leave it uncut, or 3-4 days and still look just as beautiful and taste fresh!
Storing Leftover Cake
This cake does not need to be refrigerated, but it will last a little longer if it has been cut if you put it in the fridge. Place plastic wrap directly against the cut section of cake to help ensure no air touches the cake, it will dry out quickly. Cover the rest of the cake and store for 3-4 days at room temperature or up to a week in the fridge.
I am sharing this recipe over at Imperial Sugar today. Click on Death By Chocolate Drip Cake to get the FULL Printable Recipe.
OTHER RECIPES YOU MIGHT LIKE: