
 Oh boy, I’ve been missing in action.
And first of all, let me say that I am very sorry for the negligence. Do I have an excuse? Not really. I don’t mean anything really different from what everyone else has been doing…work, holidays, family, life and all its glorious foibles. But I’ve never really gone away. Not from the food (never the food!). And not the idea of sharing recipes with you.
So, no more wallowing in apologies for what was… onward and upward, right?

first out Happy New Year! Yes, with cheerful caps as are all our intentions at the beginning of the year. What are mine? Again, not much different from all of yours, I’m sure: health, purpose, family, time, organization. Things I won’t go into here…there are much wiser voices to listen to when it comes to intentions, resolutions and goals, and the inspiration needed to achieve them. Wiser by far than my clumsy self who, in 40 odd years on earth, still hasn’t managed to figure it out. from afar

But that’s not why you and I are here anyway, is it?
We are here for the food. For its deliciousness and comfort and certainty and simplicity and firmness. For the simple joy it can bring. For our love for that which sometimes seems to be the only constant in life. Because of the way its preparation can focus us and calm our soul in times of turmoil.

And in that sense I guess there’s a resolution I can make here…that I want share more foodwith you. Share recipes with you on this blog and maybe other platforms. Play more in the kitchen and share the experience with you through my Instagram i Twitter. Share food ideas with like-minded people and watch them materialize in tangible ways. Develop recipes for people who need them. And maybe one day even meet some of you, and cook and eat with you in person! Wouldn’t that be nice?
But first, the first step. Back to the kitchen and back to this blog.
Let’s start with the bread.

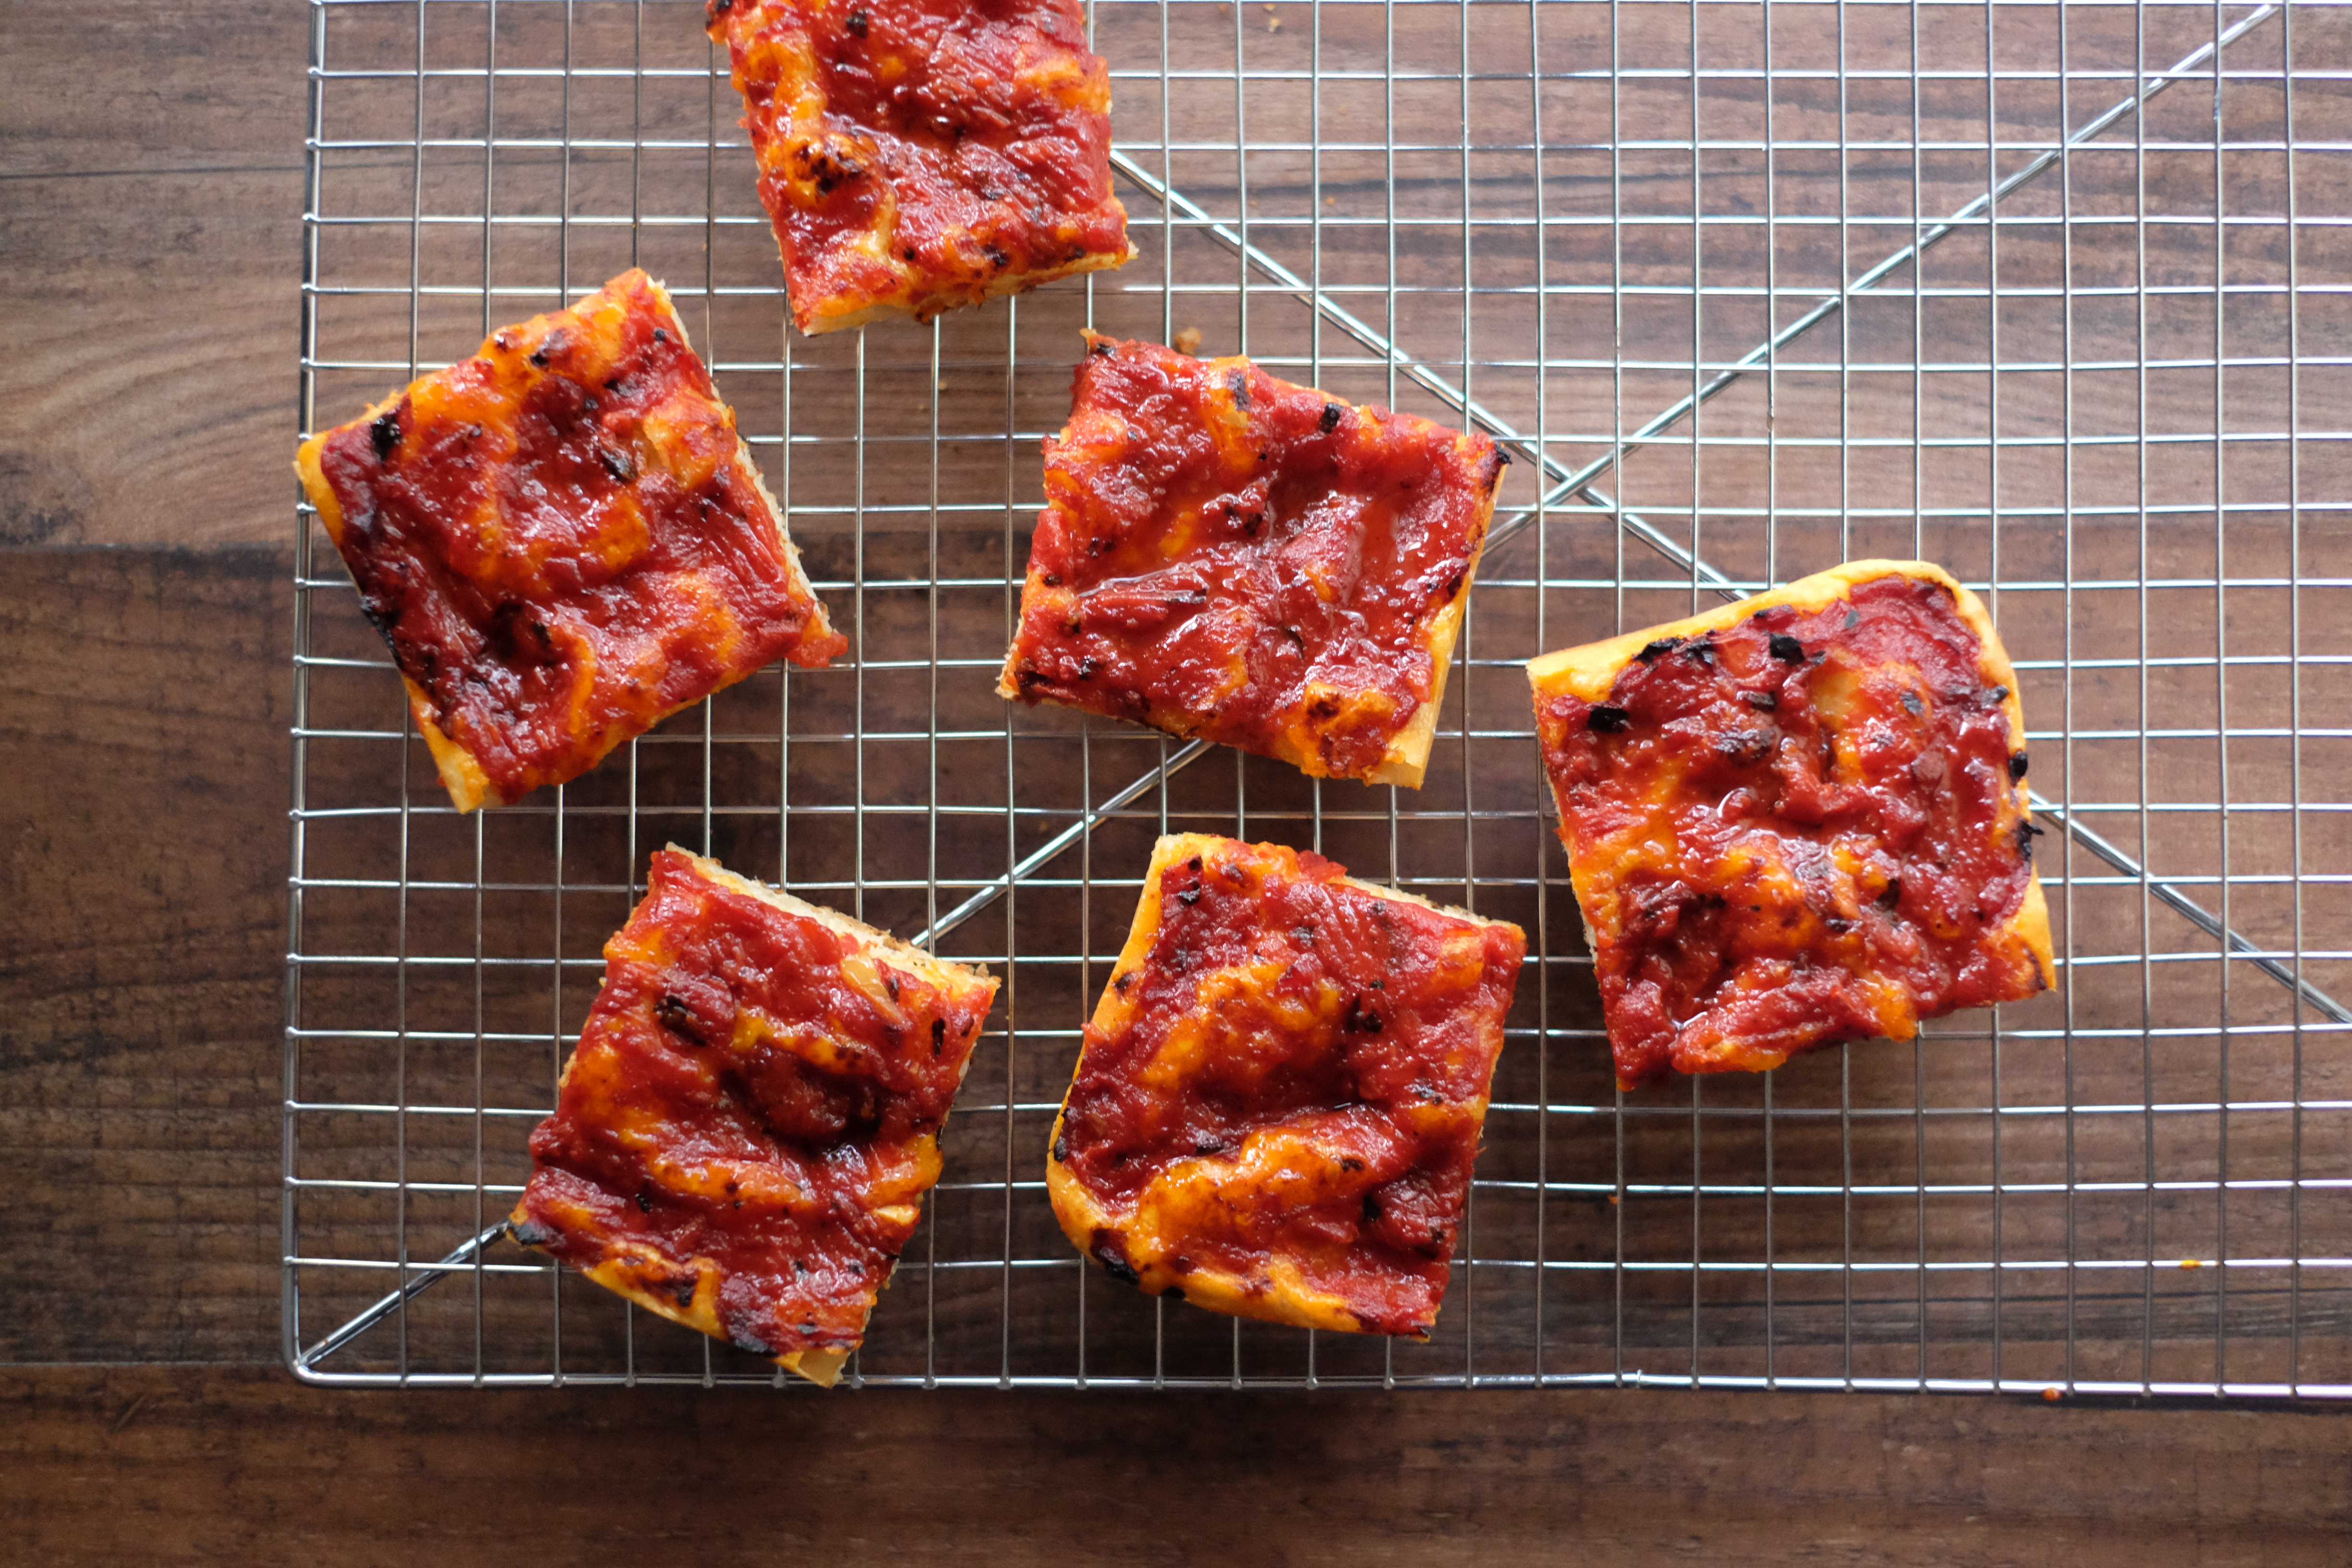
The Red Pizza
(edited very slightly from Apples For Jam by Tessa Kiros)
For the dough:
- 1 3/4 cups warm water (still comfortable on your fingers)
- 20 grams of fresh yeast (crumbled) or 10 grams of active dry yeast
- 1 teaspoon of honey
- 1 tablespoon of olive oil
- 600 grams of normal flour
- 1 1/2 teaspoons of salt
For the tomato sauce:
- 4 tablespoons of olive oil
- 1 large clove of garlic, peeled and slightly crushed
- 800 grams of chopped tomatoes in a can
- 1 teaspoon of salt
– Put the water, yeast, honey, olive oil and 3 glasses of flour in a bowl. Mix with electric mixers until smooth.
– Cover the bowl and leave it for 20-30 minutes until the mixture foams and is frothy on top.
– Mix the rest of the flour and salt. The dough will be very soft and sticky. Don’t be tempted to add extra flour.
– Now place a dough hook in the mixer and mix for about 4-5 minutes until everything is fully incorporated (see note below if you don’t have a dough hook).
– Cover the bowl with a couple of cloths and leave it in a warm, draft-free place (this is pretty much everywhere in my apartment) for about 1 1/2 hours or until the dough has risen well
– Lightly oil a baking sheet (11 x 15 x 1 1/2 inches). Prick the dough with a firm punch in the center. Spread the dough gently on the pan, pushing it to the edges with the palms of your hands. If it doesn’t stretch easily, let it sit for about 5 minutes and try again, gently stretching from the center outwards (making sure it doesn’t tear and is more or less even all the way around).
– Place the pan in a warm place without drafts. Place four glasses around the pan and place a couple of tea towels, or a towel, like a tent to completely cover the pan. This is so the dough doesn’t stick to the cloth as it rises. Leave it for about 45 minutes or until the dough has risen.
– While the dough is rising, make your tomato sauce: heat the oil with the garlic in a pan, and when you smell the garlic add the tomatoes and salt. Cook over high heat until the sauce loses its water and begins to look thick and bubbly. You can use a hand blender to puree it if you want it smoother, but I didn’t bother. I like to add a drizzle or two of olive oil when it’s done.
– Cut the top of the dough with your fingertips (so the tomato sauce has nooks and crannies to seep into), being careful not to deflate the dough. Spread the tomato sauce over your dough and spread it carefully with the back of a spoon or ladle (it may seem like a lot but it keeps the pizza moist).
– Place the tray in a very hot oven (preheated to its highest temperature…or as high as you’ll comfortably leave it if you’re a chicken like me!) and bake for about 20 minutes (exactly depending on the heat that you have). the oven can go… please see note 2 below) or until the pizza is golden brown and a little crispy here and there (check that the bottom is crispy and crunchy as well).
– Cut into squares to serve. It’s best warm, but room temperature is good too.

Note: If you don’t have a dough hook, you can also mix it by hand. Just slap it from side to side of the bowl until it comes together. The dough is too soft and sticky to really knead.
Note #2: I suggest you check before the 20 minutes are up… I took mine out at exactly 20 minutes and the bottom was a little burnt. Something to keep in mind for next time!

Remember this rose petal KitchenAid Mini Did I score last year? I have certainly put it to the test. I did cupcakes here. And then I used the meat grinder attachment and made sausage/meatballs around here. At the same time, proving that this little mini mixer had maximum power.
With all that under his belt I thought it was time to give his dough hook a whirl. I also hadn’t baked bread in a while, so it was the perfect time to do both.

Tessa Kiros cookbooks are some of my favorites. Not only for her recipes and detailed instructions, but also for her lyrical voice, idyllic stories and wise reflections on life. I have found comfort in his calm, familiar voice during many difficult times.
Her Pizza Rossa recipe was one I had bookmarked a while ago, but never got around to making. Its simplicity and familiarity appealed to me, and what can I say, I love my carbs!

The recipe was perfect for testing the little dough hook (because it’s really “little”…smaller than the regular dough hook on my standard KitchenAid). And I’m happy to report that it performed well, making short work of the sticky dough.
The recipe produces a nice thick “pizza” with the thickness and breadiness of a focaccia, making it a great midday snack…or even a meal with a simple salad and maybe some charcuterie for to accompany You can also top it with grated cheese (and maybe some salami!) before baking for a more consistent pizza.

So… the first month of the year is almost over, but I just got this post out. First of all I hope. Far more. So will you stay? I promise (yes, I promise!) to share more recipes and cooking moments, tips and tricks, and maybe even some thoughts on life, right here.
But for now, first things first.
Related