


I created this recipe while in Denmark for a quick and satisfying breakfast, inspired by the famous Danish breakfast rolls and baked goods, ‘rundstykker’. These sorghum buns are perfect straight from the oven, easy to make and freeze, and super delicious. Heat them up, cut them crosswise and dress them with butter, hazelnut paste and fresh fruit, or make avocado and egg toast. The possibilities are endless.
My inspiration for creating the morning sorghum buns
When in Denmark, do what the Danes do: eat bread in the morning. Many things contributed to my creation of this sorghum flour recipe, but the main one is that I am in Denmark, working on the renovation of our summer house, and I needed something quick and satisfying for breakfast.
Also, I don’t have a fully equipped kitchen and time to make some of my staple foods like cassava tortillas. So I had to come up with something easy to make, with accessible ingredients that can be frozen and reheated right before eating.
I learned how to make “rundstykker” from my mother-in-law. And I used to make them with graham flour before I started my journey for the plant paradox (eating gluten-free and lectin-free). Although they can be eaten at any time of the day, they are made for the morning and should be eaten warm.
Another suggestion for me to create these was my sister-in-law making a similar recipe with a lectin-free flour mix that I left for her. He used an egg and yogurt, which I will try in the future. But I wanted to make something without eggs or dairy, to fit as many diets as possible.
How to add sorghum flour to bread recipes
I started with the idea of using sorghum flour. It’s easy to find in Denmark, and I had a big bag. It is, in my opinion, the closest thing to wholemeal flour. As I usually do, I have completed the dry mixture with other flours that will add texture, taste and improve the nutritional profile of the final product.
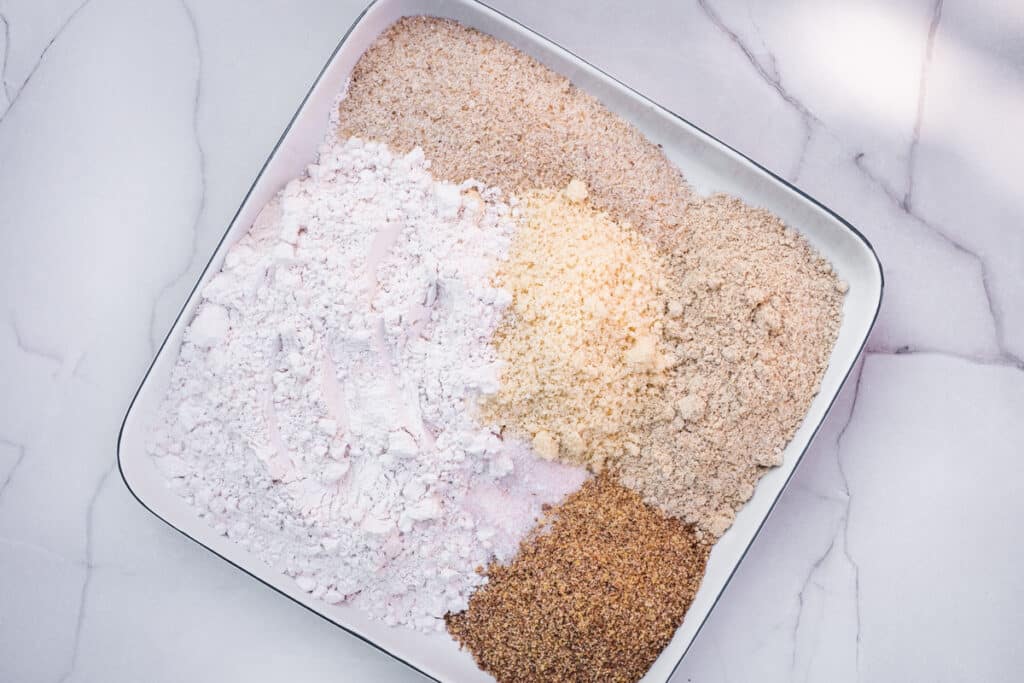
Here’s what the gluten-free flour mix for morning sorghum rolls includes:
- sorghum flour
- ground flax seeds
- chufa flour
- almond flour
- psyllium husk
- salt
If you need a nut-free mix, replace the almond flour with chufa flour or add more sorghum flour.
Fresh yeast, conversions to dry yeast
Whereas in Europe, I like to use fresh yeast, which comes in cubes (also called tablets). It is found in the refrigerated or frozen sections of supermarkets. In my experience, fresh yeast is not easy to find in the US, but dry yeast will work just fine.
While there are several ways to activate and incorporate yeast into a recipe, it’s best to follow the instructions on the package you’re purchasing or use the method you’re most comfortable with.
If you can’t find fresh yeast where you are, your other options are active dry yeast and instant dry yeast. I found this article that explains how to convert yeast types into recipes if you need help.
According to this calculator, for the 10 grams of fresh yeast I used, you should use 4 grams of active dry yeast. A pack usually has 7 grams. And to replace it with instant yeast, you need 3.3 grams.
This dough and the bread don’t rise much, so don’t expect it to double in volume. However, the dough aerates as it rests, and I prefer not to knead this dough too much.
Does it work without yeast?
I’m happy to say that after another round of testing, this gluten free bread works great without yeast. The only slight difference is in the taste, where the yeast version tastes and smells more like typical yeast bread, while the other one does not.
The texture is very similar, and the yeast version is NOT really easier to make since you don’t have to work with the yeast, and the dough can only rest for 10 minutes.
If you choose the unleavened version, do this:
- Add a teaspoon of baking soda to the dry mixture
- Add the honey to the dough when you add the water
- Rest the dough for only 10 minutes at room temperature
- I believe this version is ready in 50 minutes, but times may vary depending on the type of oven and type of pan you use.
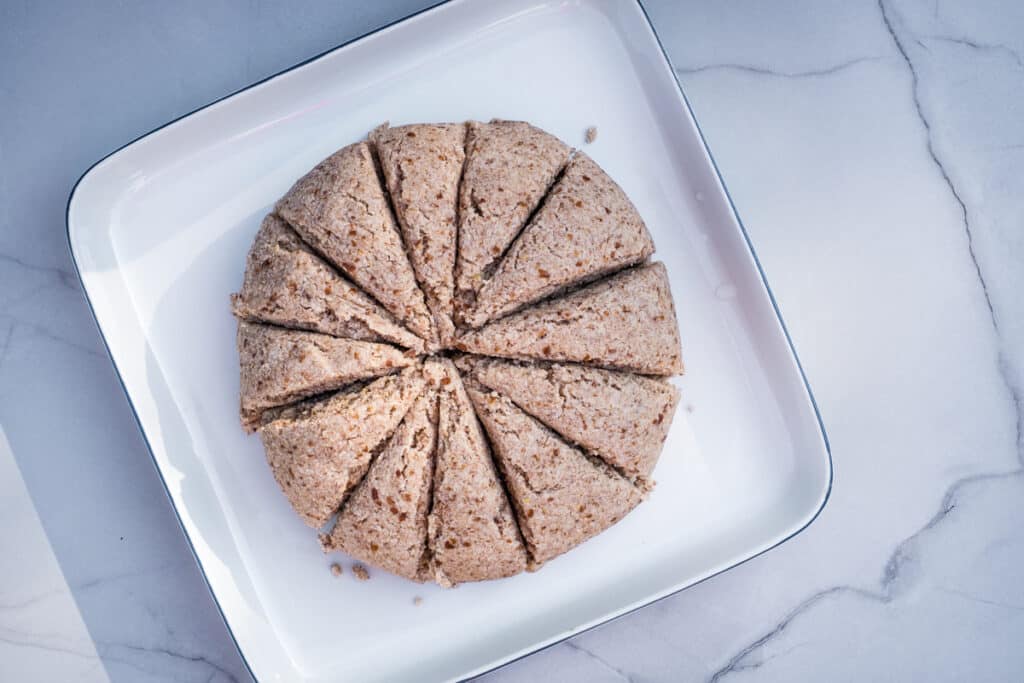
- You can make 12 small loaves, which you will cut crosswise, or 6 larger loaves, which you can also cut into slices of traditional bread (see images)
The wet ingredients
Traditionally, this bread is made with milk and butter and has an egg wash. I wanted to keep this version vegan and simple to cover as many dietary restrictions as possible. I want to try adding some butter and an egg wash in the future.
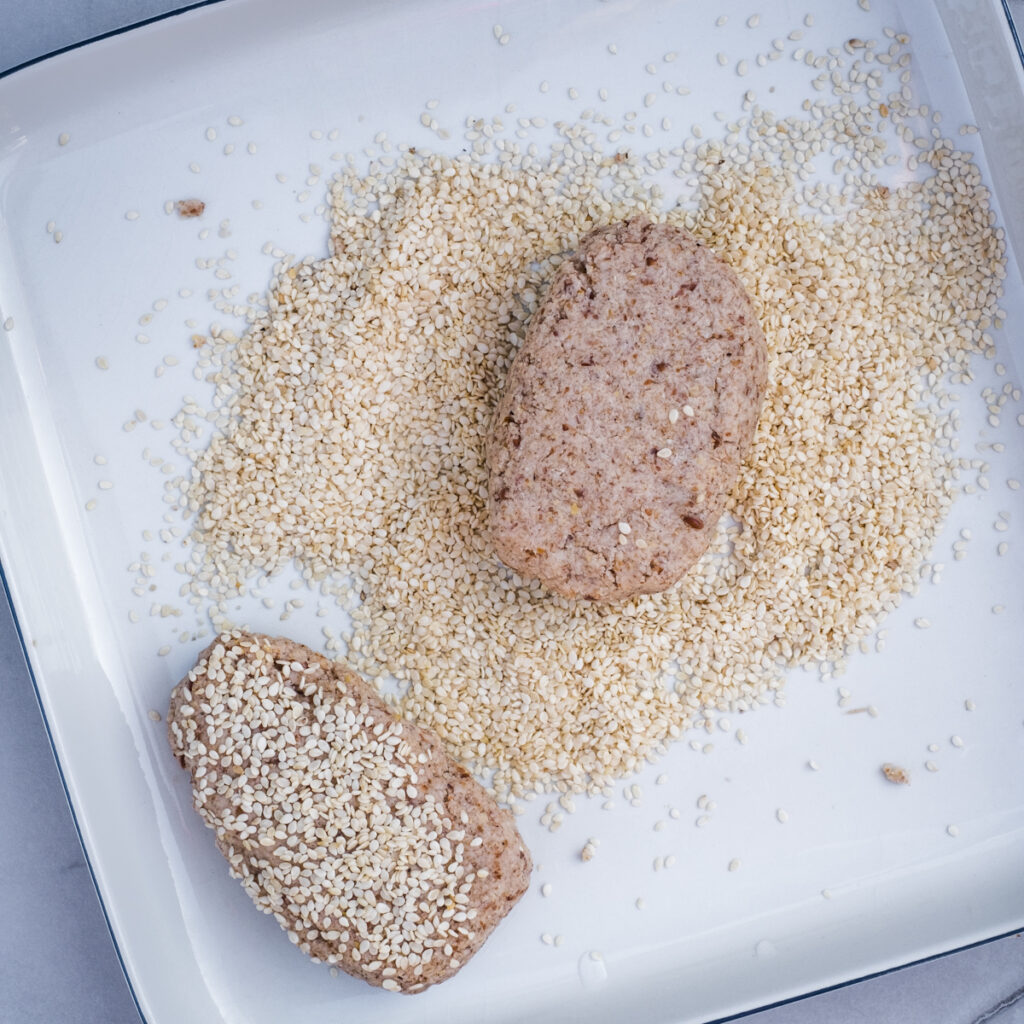
I used whole coconut milk mixed with lemon juice, warm water and a little extra virgin olive oil for this recipe. I skipped the egg wash, but dipped the tops of the buns in sesame seeds.
How to handle the dough for sorghum bread
For some bread, kneading well is great, but for this one it is minimal. Here are the steps:
- Mix the dry ingredients
- Add the dissolved yeast to the dry ingredients
- Add the coconut milk and water (making sure nothing is too hot or too cold)
- Mix with a spatula until incorporated and gently knead into a ball
- Let it sit in a warm place, covered, for about an hour
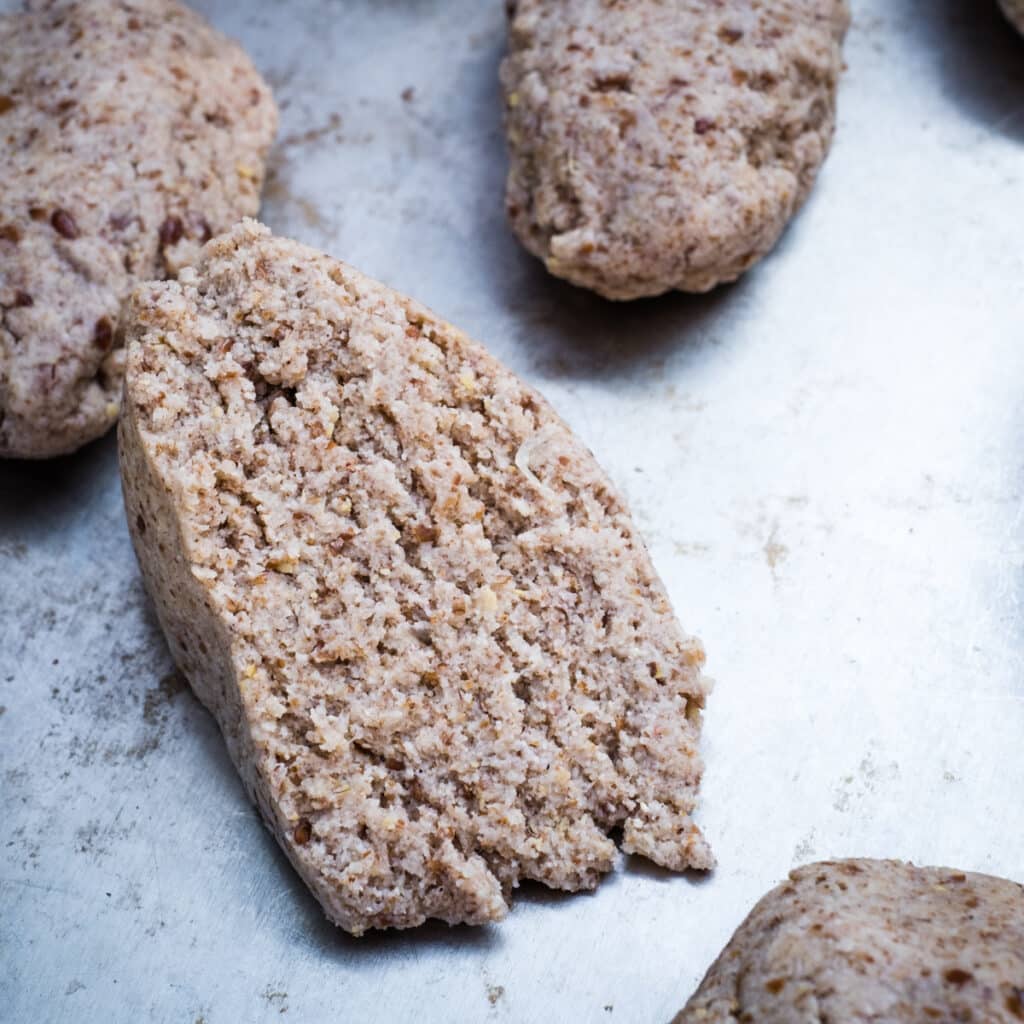
- Portion and gently shape into oval buns (the bun will be no more than an inch high) and dip the tops in sesame seeds
How to bake sorghum rolls
I use a stainless steel sheet pan and in my experience no parchment paper or grease is needed. I bake them at 400F / 200C for about 60 minutes. You can start seeing them earlier. They turn golden brown. My favorite part of this bread is the crust.
I hope you are not a fan of soft bread as this may not be for you. The experience of eating this bread is more like a hard crust sourdough than a soft roll.
How to store and serve sorghum buns
It’s important to eat these sorghum rolls hot, but you can also cool them completely before slicing. The best way to store them, and the only way I recommend, is to freeze them and reheat them in the oven for about 10 minutes, at 400F / 200C, just before you eat them. A toaster can also be used.
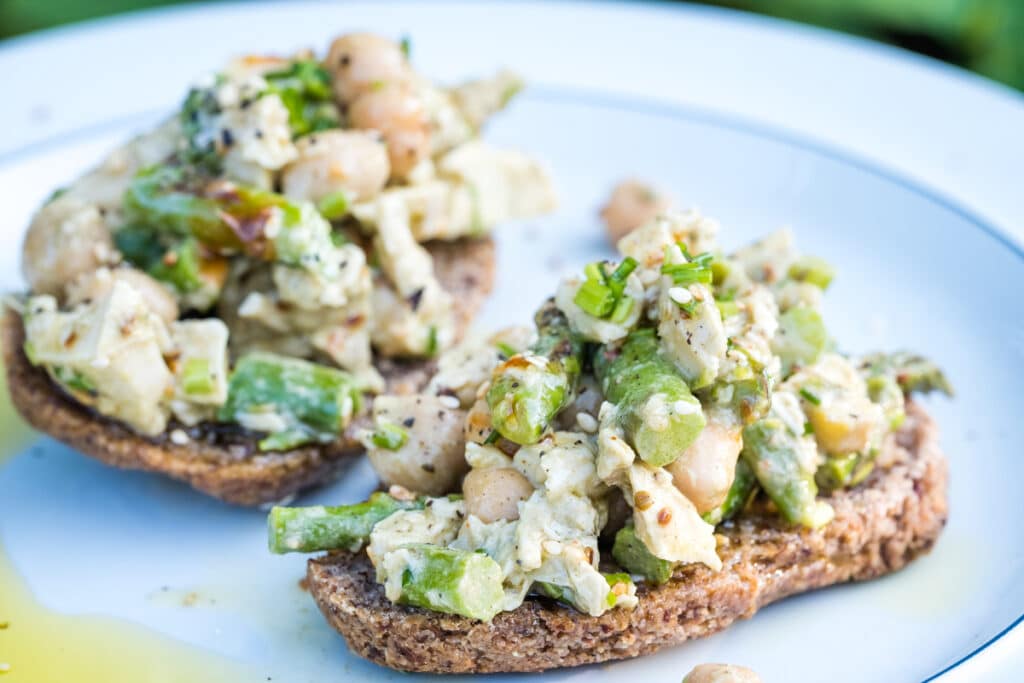
Slice them crosswise and spread them with butter or nut butter, over fresh fruit or homemade sugar-free jam, or make avocado and egg toast. Or use them on toast with anything from avocado and eggs to chicken salad to our delicious and nutritious Beef Liver Pate with Fresh Herbs.
Sorghum bread recipe
For another sorghum bread recipe and gluten-free baking, be sure to try my Green Banana Sorghum Gluten-Free Bread. An easy to make and nutritious flatbread.
*This post contains affiliate links, which means I receive a small commission if you decide to purchase something through one of my links, at no extra cost to you.
Ingredients
- DRY INGREDIENTS:
- 2 cups of sorghum flour
- 1/2 cup ground flax seeds
- 1/2 cup of chufa flour
- 1/2 cup almond flour
- 1/4 cup psyllium husk
- 1 1/2 teaspoons of salt
- THE YEAST MIX
- 10 grams fresh yeast (see post for alternatives)
- 2, 3 tablespoons of warm water
- 1 teaspoon of local honey
- WET INGREDIENTS:
- 3/4 cup full fat coconut milk
- 3 tablespoons of lemon juice
- 2 tablespoons of extra virgin olive oil
- 1 cup of warm water
- 1/4 cup sesame seeds
Instructions
Mix the coconut milk with the lemon juice and let it sit for 10-15 minutes.
Mix the dry ingredients in a large bowl.
Make the yeast mixture by mixing the yeast with the water and honey until dissolved.
Make a well with the dry ingredients and add the yeast.
Before you start adding the coconut milk to the bowl, add some warm water so it’s not too cold (you don’t want anything too hot or too cold).
Once all the coconut milk has been added, add the rest of the water and olive oil. Gently knead the dough and form a ball. Cover and set aside in a warm place for about an hour. It won’t rise much but it will get a fluffy texture.
Preheat oven to 400F (200C) and prepare a baking sheet (no grease or parchment paper necessary in my experience.
Divide the ball into 12 equal parts. Gently form into an oval shape, about an inch high. Repeat with everything and when finished dip the top of the roll with the sesame seeds.
Place all the buns on the baking tray and bake for about 60 minutes. Check them out at 50 minutes. I like to have a crust so I prefer them after 60 minutes. They are ideal for freezing. You can reheat them in a preheated oven (400F/200C), straight from the freezer, for about 10 minutes.
notes
I love to eat this warm bread. After I make a full batch and the bread has cooled, I freeze it and reheat it in the oven, straight from the freezer, before eating. 400F / 200C for 10 minutes works fine for me. For a yeast-free version, see the previous post.