
This wonderful cake combines the indulgence of banana bread with the stickiness of Japanese mochi. So we called it “Mochi Banana Bread”! It’s a quick and easy recipe that will surprise you and we hope it becomes your new favorite breakfast sandwich!
How do you make banana bread with mochi? Our recipe starts with the classic banana bread cake but uses a combination of rice and Mochi flour instead of wheat flour. So yes, it is completely gluten free!
called mochi flour mochigomeko in Japan and it consists of mochigoma Rice. And what is that? Mochigome is a type of short-grain rice with an incredibly high starch content.
This particular rice is also known as sticky rice or sweet sticky rice outside of Japan. And because it contains so much starch, it becomes sticky and gooey (hence “gooey”) when cooked.
As it turns out, flour ground from glutinous rice also turns sticky and sticky! It is precisely this flour that makes the famous Japanese mochi balls so irresistibly tough and stretchy.
Using glutinous rice flour (mochi flour) in this banana bread means you’re a moister crumb this is also A little sticky and sticky. So unique and delicious!
Of course, you can’t use mochi flour alone in a cake this size or it will end up being too dense and gummy.
So we paired it with regular rice flour keeping the recipe gluten free and gives the banana bread a touch of sweetness.
Here are a few practical tips on the ingredients used:
-
Overripe bananas
They should be so ripe that the skin looks blackish. This means the bananas are soft and super sweet, making the cake batter thick, creamy, and sweet.
-
Preserved Coconut Milk
We used it as a milk substitute to make our cake vegan and dairy free. Also tastes great in this recipe!
-
baking powder
Like this banana bread has no eggs, it takes an extra kick to level up. So we used a little more baking soda than usual to allow the rice cake to grow nicely.
-
sweetener
You can use sugar or substitute it with sweetener erythritol if you want to keep sugar down. Erythritol is a natural sweetener that tastes and looks like sugar but has no calories – and is perfect for baked goods!
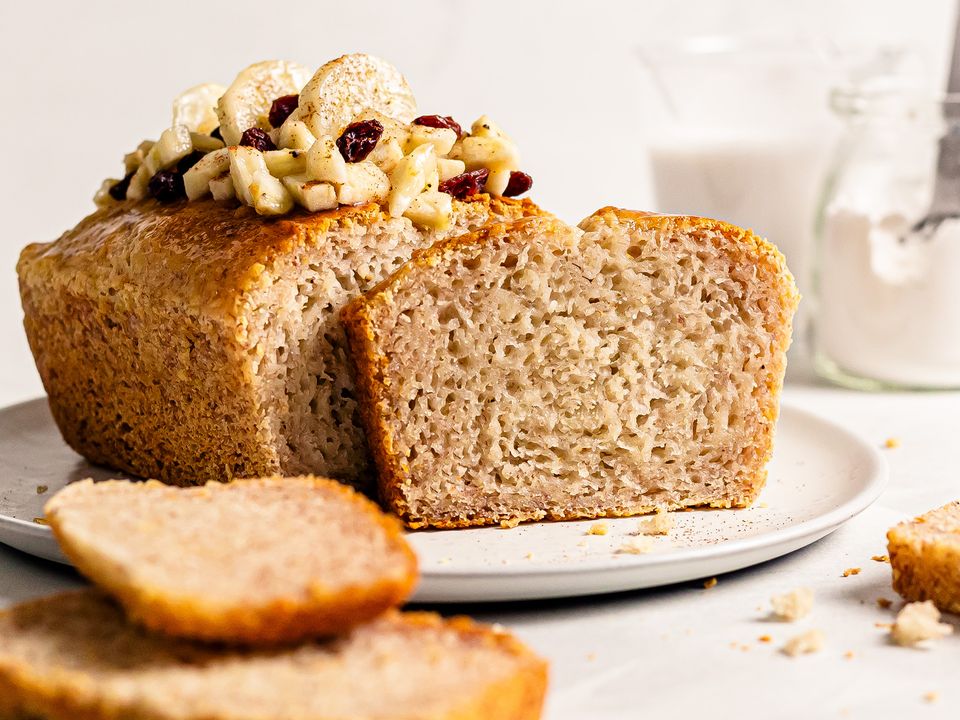
Wondering how this mochi loaf tastes?
It’s bursting with flavors of banana and coconut milk with a hint of rice flour sweetness. It’s so spongy and at the same time wonderfully moist and sticky. You will love it!
For more sweet treats made with mochi flour, try these stretchy mochi wafers or these mochi cookies with a sticky heart. So good!
And if you want to use mochi in savory recipes instead, check out these mochi flour buns for inspiration.
Ingredients
| rice flour | 230 g |
| Mochi flour (glutinous rice flour) | 80 g |
| baking powder | 20 g |
| caster sugar (or sugar-free erythritol) | 80 g |
| Salt | 1 pinch |
| Overripe bananas (peeled) | 300g |
| coconut milk | 300ml |
| vegetable oil | 45ml |
| cinnamon (optional) | 1/2 tsp |
Step 1
Preheat oven to 185°C (355°F).
Take an 8″ x 4″ (21cm x 11cm) loaf tin and grease with a little oil or line with baking paper.
For the cake batter, place the rice flour, mochi flour, baking powder, sugar, and salt in a bowl.
Mix thoroughly to ensure the baking powder is evenly distributed so the banana cake rises evenly.
Mochi flour is also called sticky rice flour or sweet rice flourand you can find it online or at your local Asian grocery store.
As for the sugar, you can replace it with the same amount erythritola safe and natural sweetener that looks like sugar but has no calories.
We always use it in our sugar-free baked goods – give it a try!

step 2
Blend the overripe bananas in a blender until smooth and creamy.
Then transfer the mashed bananas to a large bowl and add the coconut milk, oil, and ground cinnamon if using.
Using a hand mixer or an electric mixer, mix the ingredients into a smooth batter.

step 3
Now mix the dry ingredients into the wet ones: add the mochi flour mixture, one-third at a time, and mix well until fully incorporated before adding more.
Using a hand mixer or an electric mixer, mix the mochi cake batter until there are no lumps and you have a smooth and creamy cake batter.

step 4
Pour the mochi cake batter into the prepared pan and smooth out with a spatula.
Well, here’s a little trick to ensure the banana bread will increase evenly.
Mix a little starch with oil in a small cup to make a thin paste and spread over a knife to coat.
Then use the coated knife to “cut” a slit down the middle of the cake batter lengthwise as shown in the picture.

step 5
Bake the mochi cake in the oven at 185°C (355°F) for 50 minutes to 1 hour or until golden and cooked through.
Allow the mochi loaf to cool for a few minutes before inverting onto a tray, then allow to cool completely.

step 6
Your delicious mochi banana bread is ready!
It has the look and taste of classic banana bread, plus a hint of sweetness from the rice flour.
And thanks to mochi flour, the cake is ready very moist, a little sticky and stickya bit like a Japanese mochi would feel.
Enjoy a nice slice with a cup of blue milk latte, matcha tea, or hot chocolate with chai spices!

tips
This Mochi Banana Cake is very moist and will keep in an airtight container for 2-3 days.
We recommend freezing the individual slices of cake wrapped in parchment paper and reheating in the oven or toaster before serving – they’ll get nice and gooey!