

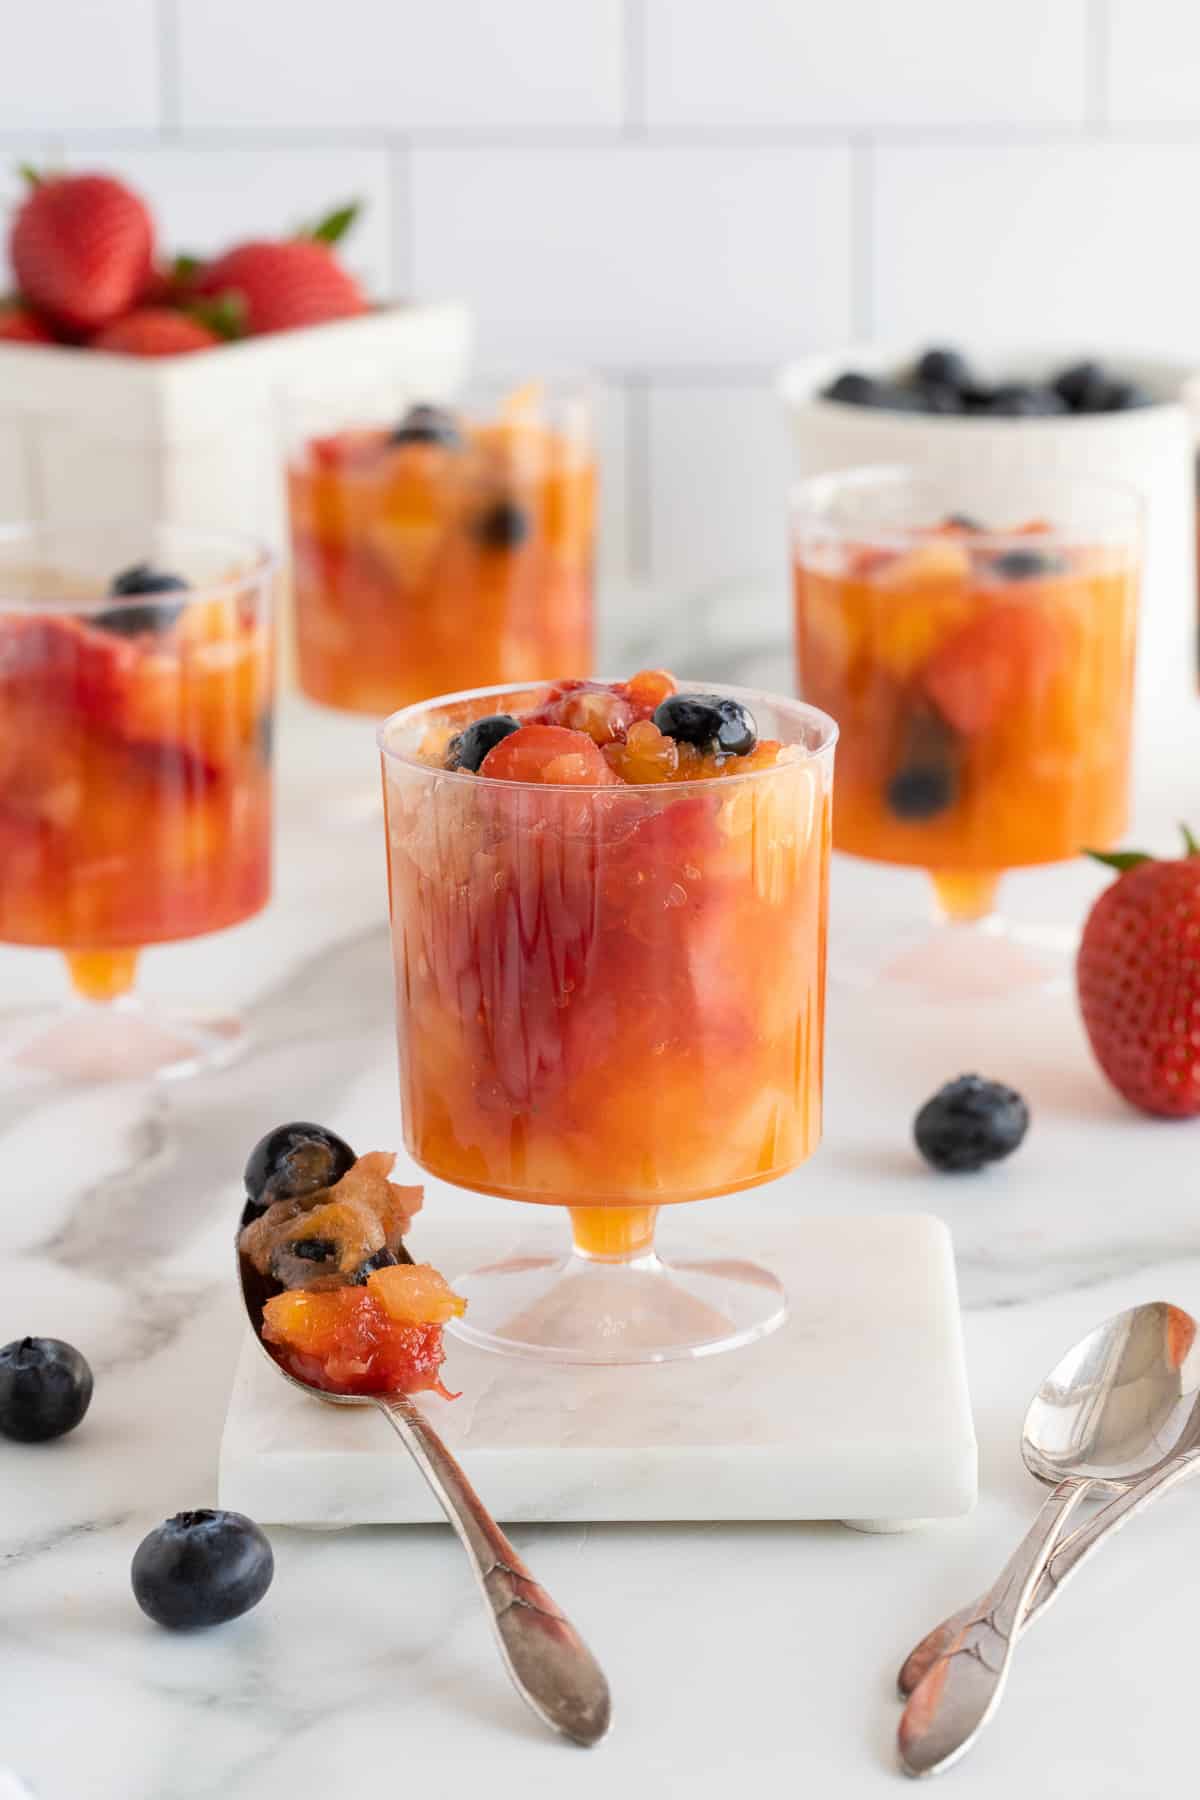
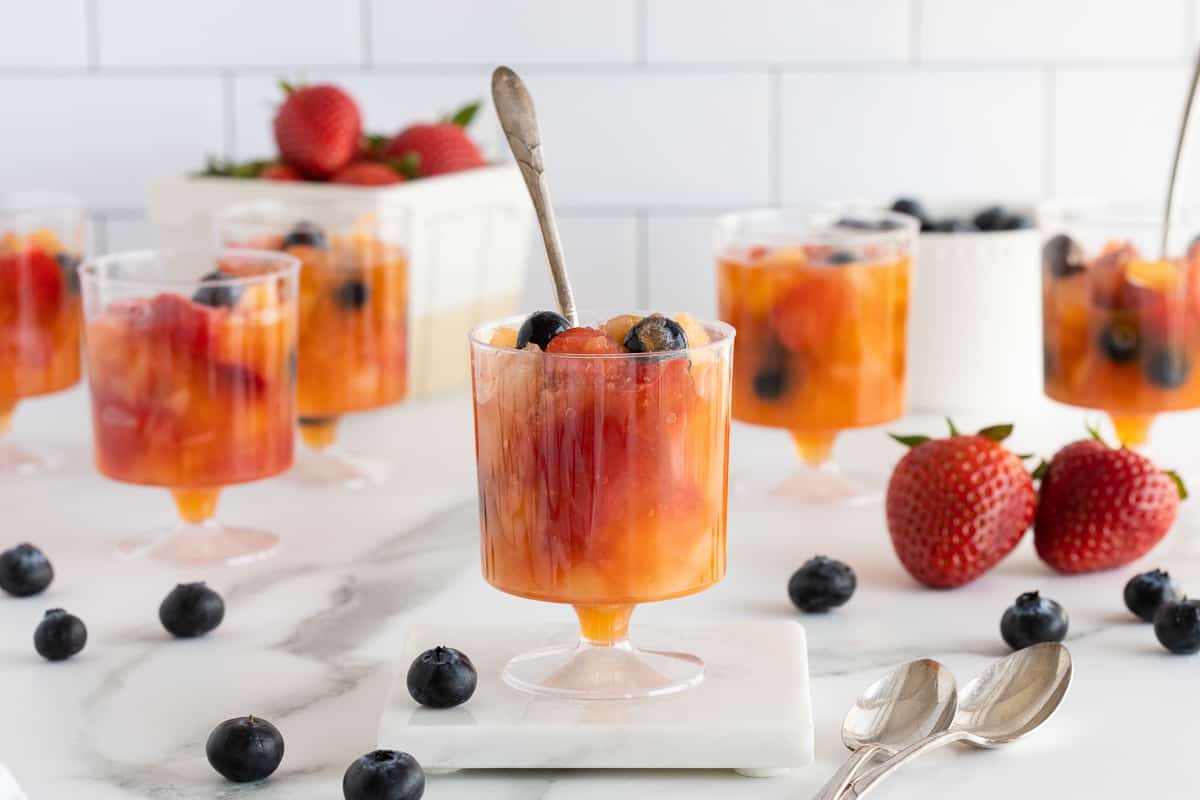
Frozen Fruit Cups are a refreshing and delicious treat that can be made any time of year. They’re easy to make, customizable, and a great choice for a holiday menu.
This vintage Frozen Fruit Cups recipe is from my mother-in-law’s collection. She used to serve them on her Easter menu and I fell in love with the recipe instantly when I first had them all those years ago.
These pretty little mugs of sweet and squishy fruit are an unexpected and very fun way to brighten up a menu.
Recipe Highlights
- Recipe for the whole season – The ingredient list consists of canned and frozen fruits, so this recipe works regardless of the season. Perfect for summer BBQs and holiday menus all year round.
- progress – The cups are assembled a day in advance and are ready to serve the next day.
- Customizable – The basic recipe can be adapted with different fruits according to your taste.
- child friendly – These refreshing squishy fruit cups are guaranteed to be kid-friendly!
As I prepare holiday meals, I can’t help but feel a powerful connection to the women who have most influenced me in my life. My own mother, Margaret, and my mother-in-law, LaVerne.
I have been very fortunate to have these two amazing strong women in my life. I channel them both in the kitchen all the time. Her recipes are always included in our holiday meals so everyone in the family can feel that connection. Funny how a simple Frozen Fruit Cup can create such a nostalgic feeling!
The family recipe tradition is a part of their legacy that I will always cherish and do my best to keep alive.
Notes on ingredients
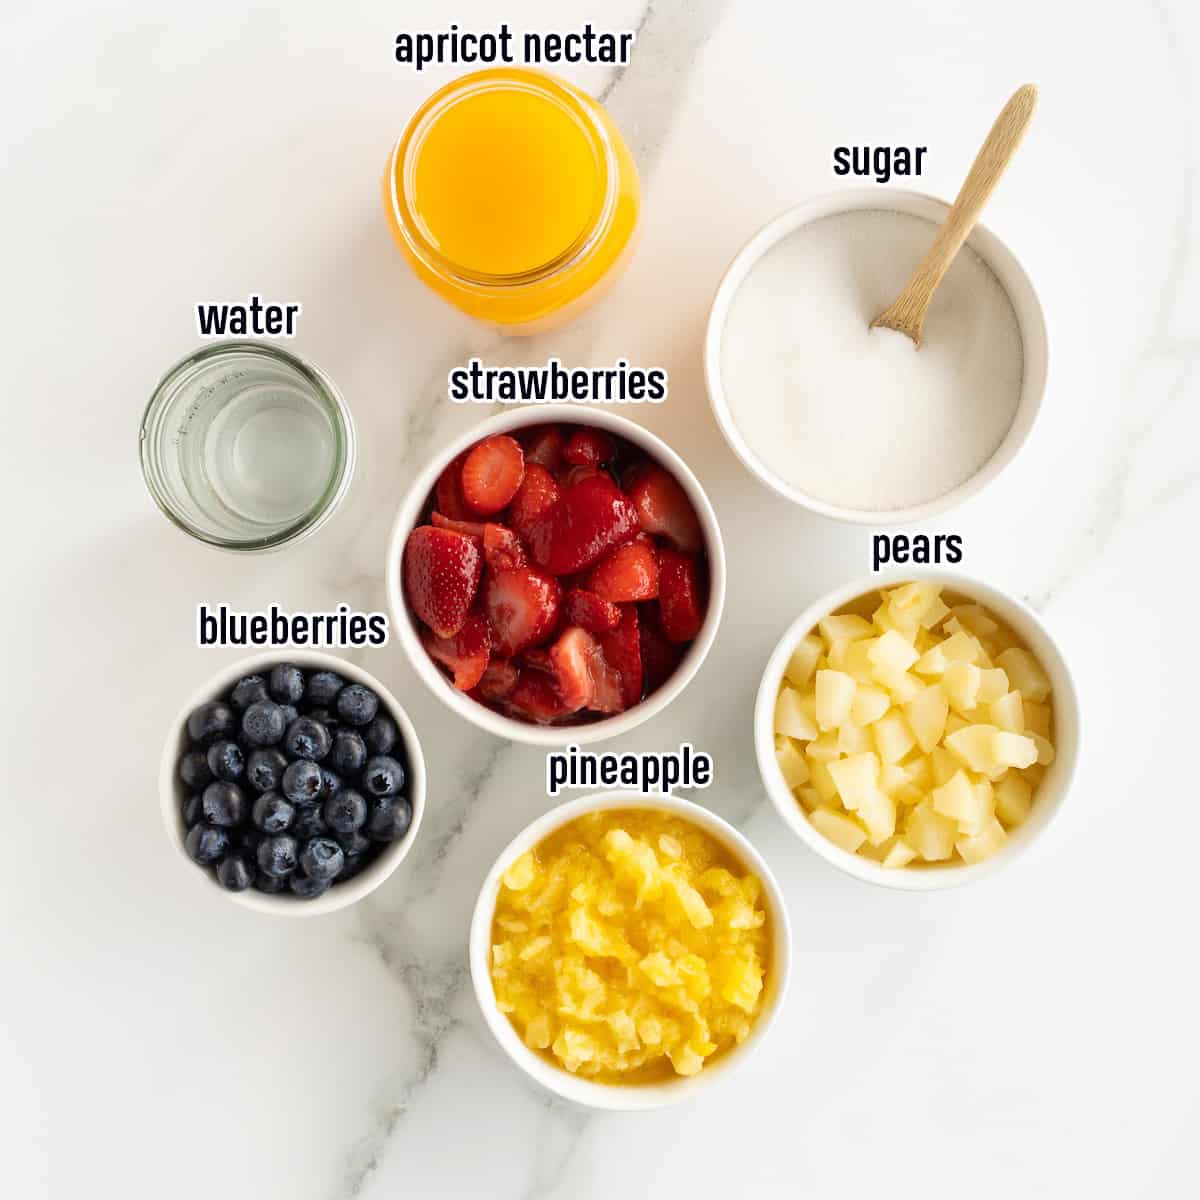
- apricot nectar – Look for individual cans of apricot nectar in the juice department of your store. I use the Kern brand.
- Simple syrup – You make a simple syrup using granulated sugar and water.
- strawberries – Sliced frozen strawberries in syrup are usually packed in a tub or box. Thaw them in the fridge and don’t drain them.
- pineapple – Canned mashed pineapple in 100% juice, undrained.
- pears – Canned pears, drained and chopped.
- blueberries – Since there are fresh blueberries almost all year round, I like to add some for a pop of color.
This basic recipe can be adapted with a variety of different fruits. Below are some delicious variations.
How to make frozen fruit cups
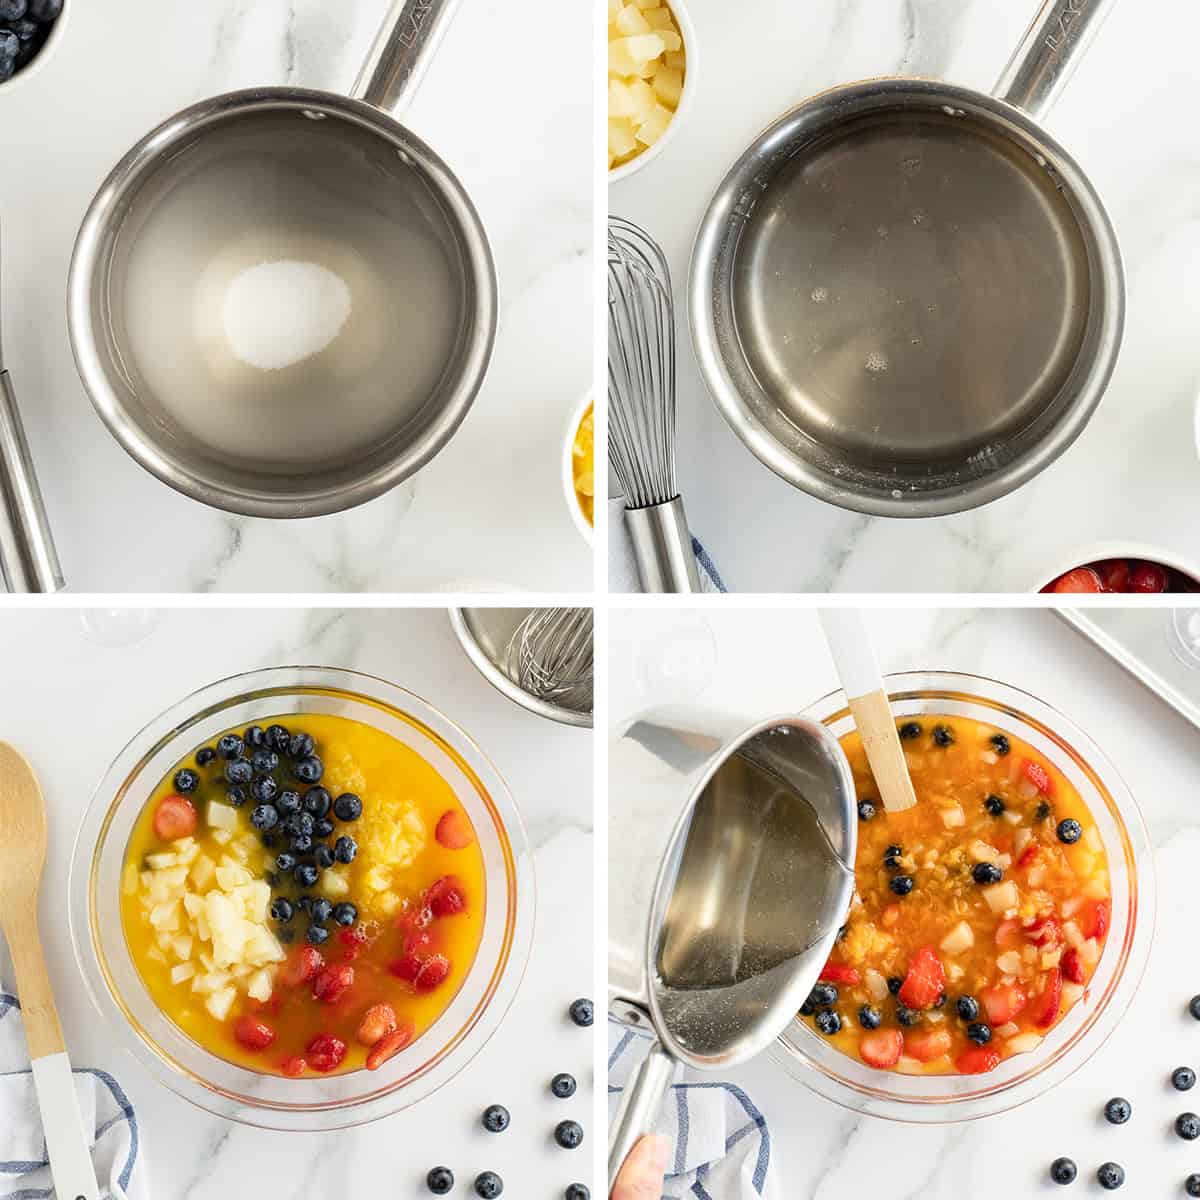
- Simple syrup– Make your simple syrup by bringing the sugar and water to a boil. Let the mixture simmer until slightly syrupy, about 10 to 12 minutes.
- Cool – The simple syrup will thicken and become even more syrupy as it cools.
- fruit – Place the fruit and apricot nectar in a large mixing bowl.
- Combine – Stir in the cooled syrup and stir.
How to freeze and serve
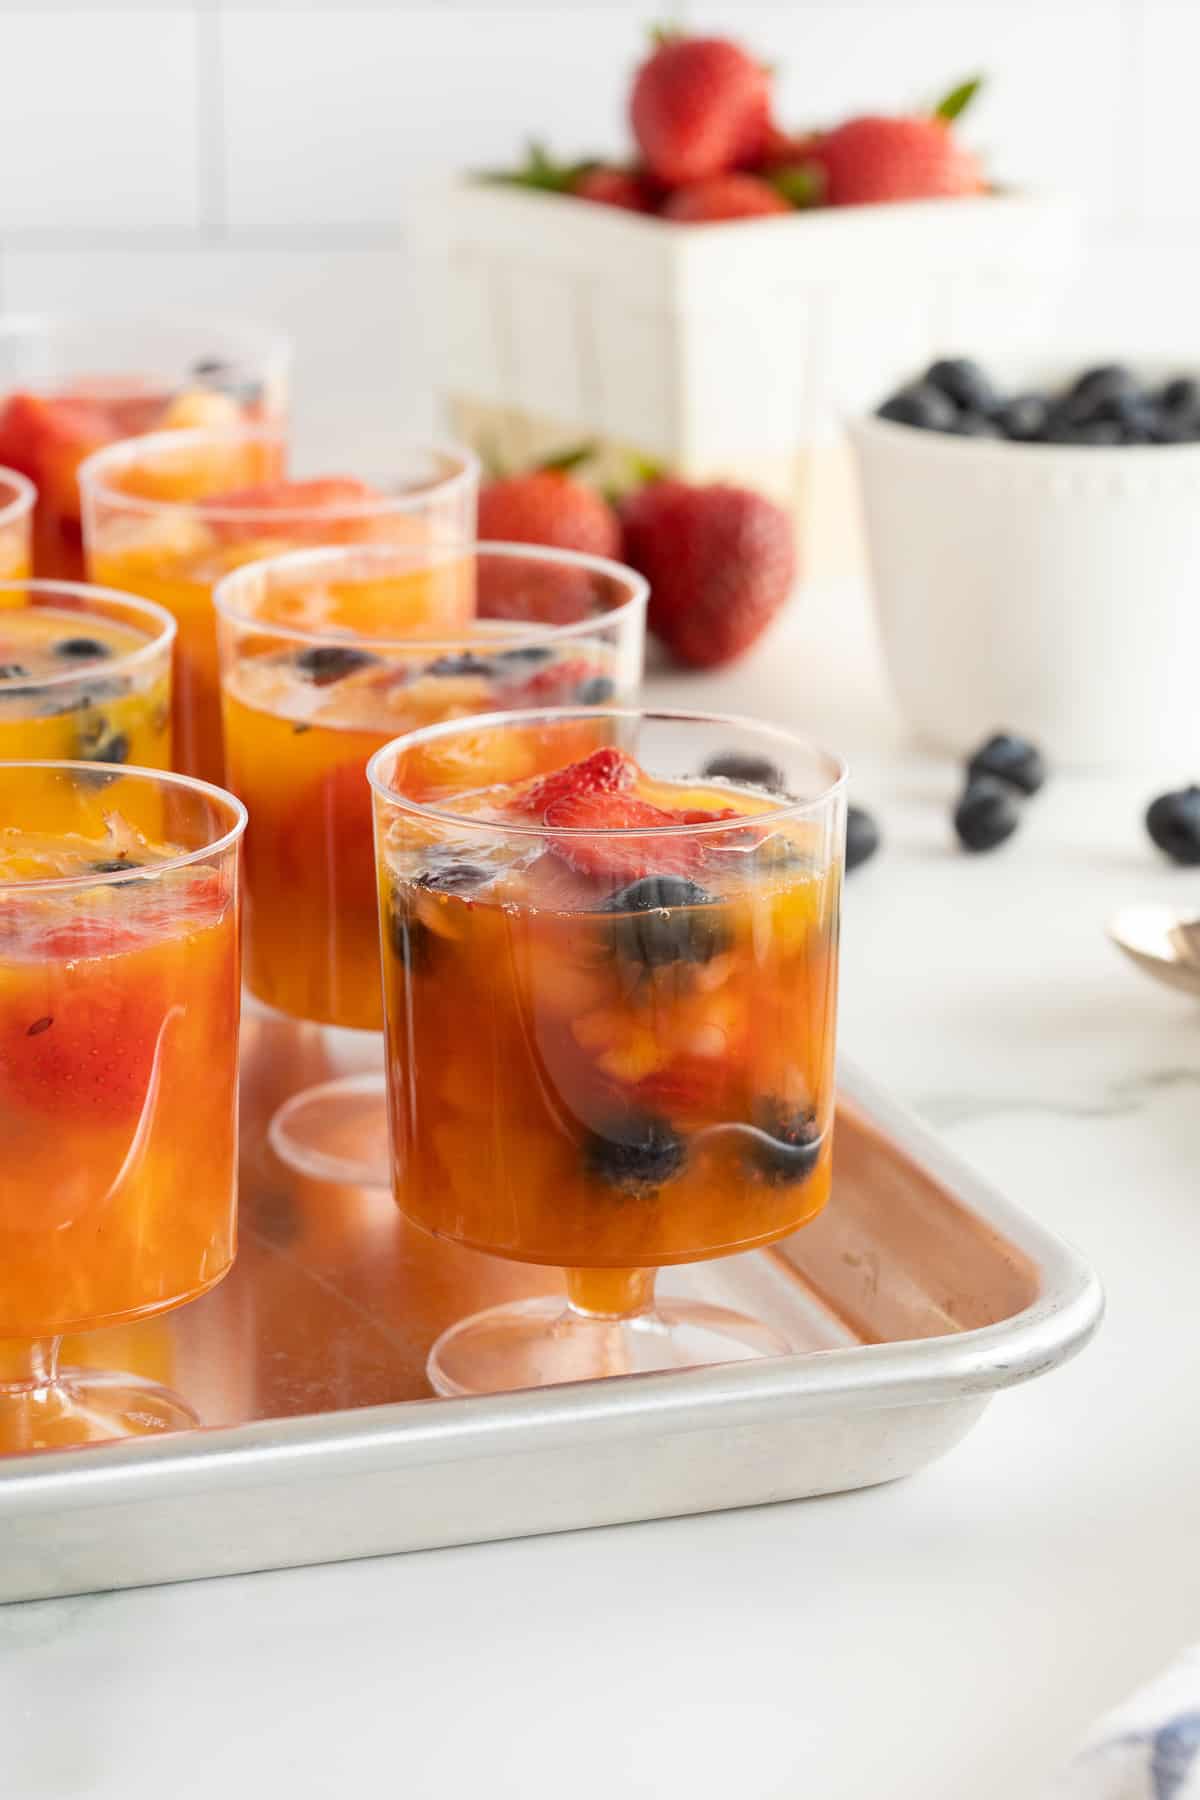
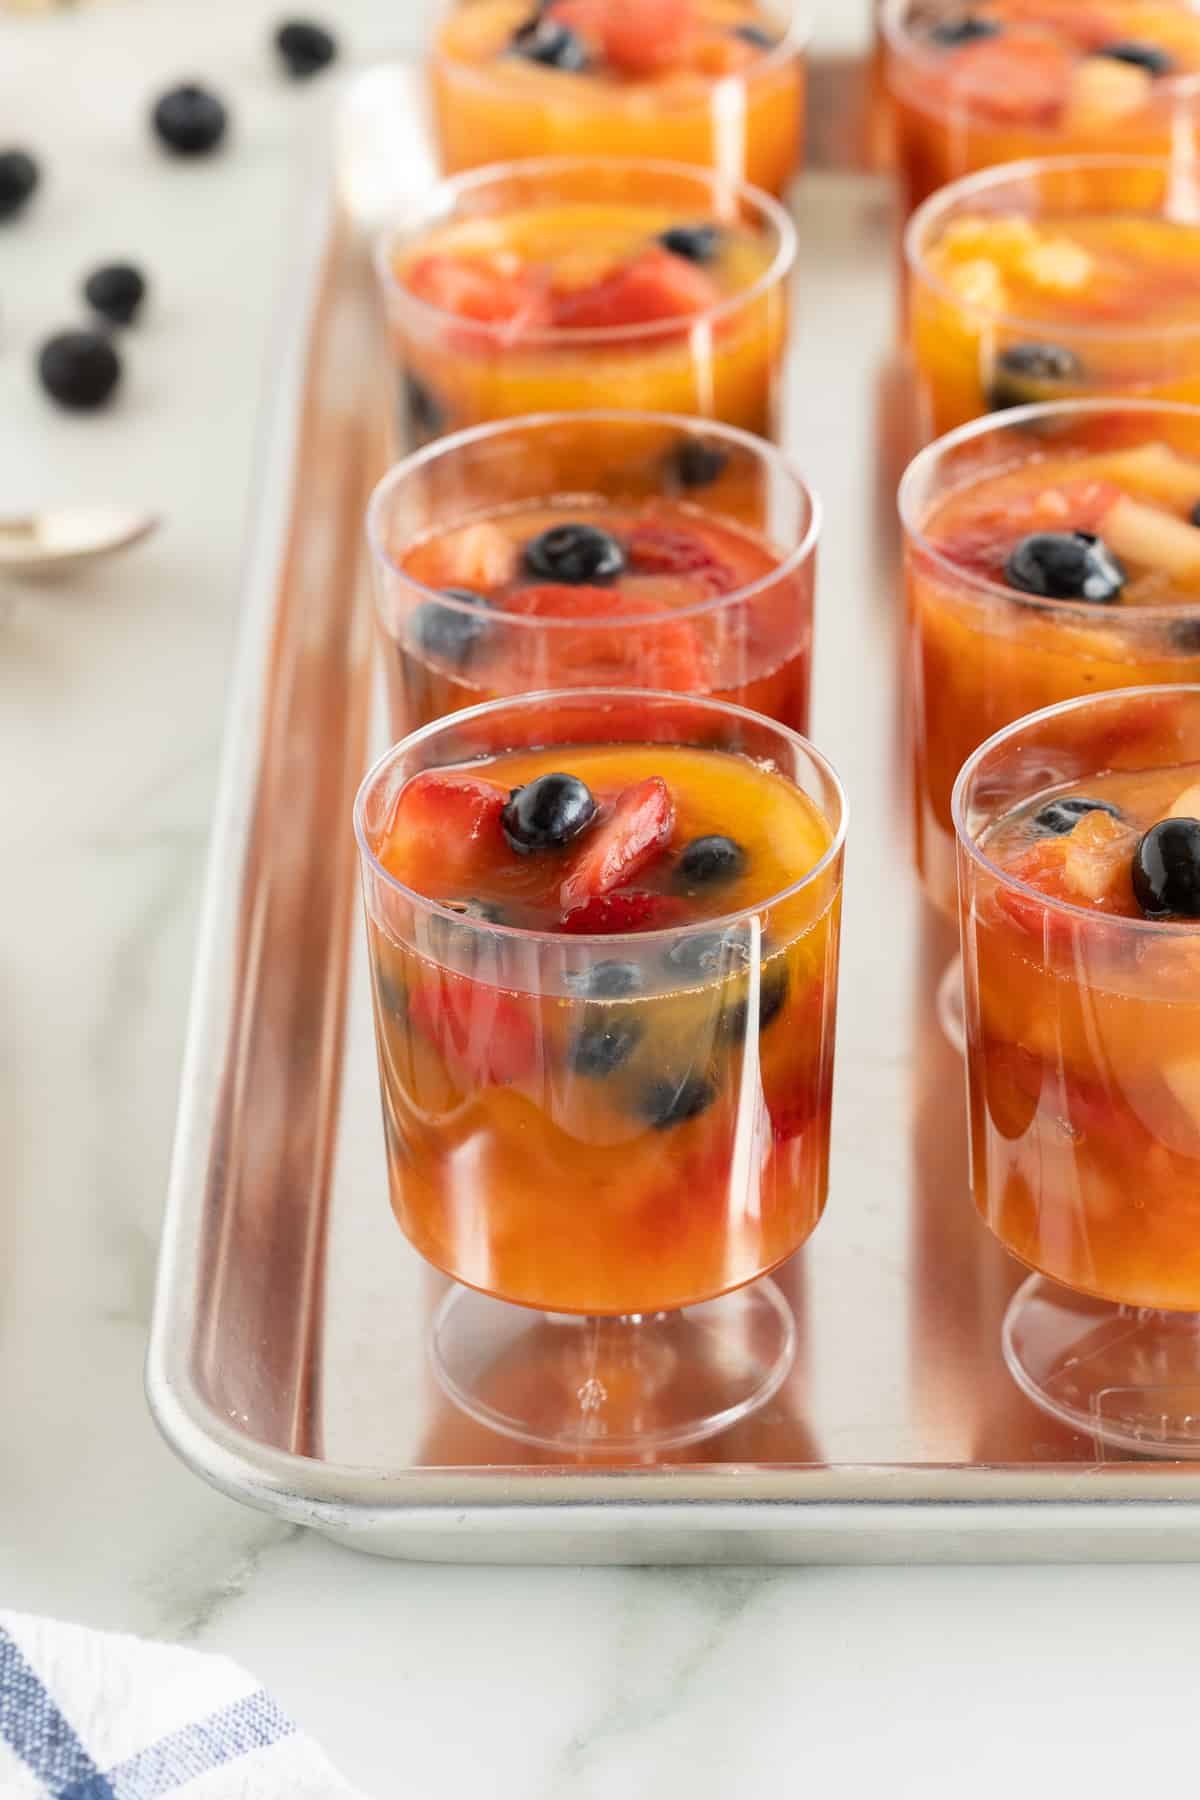
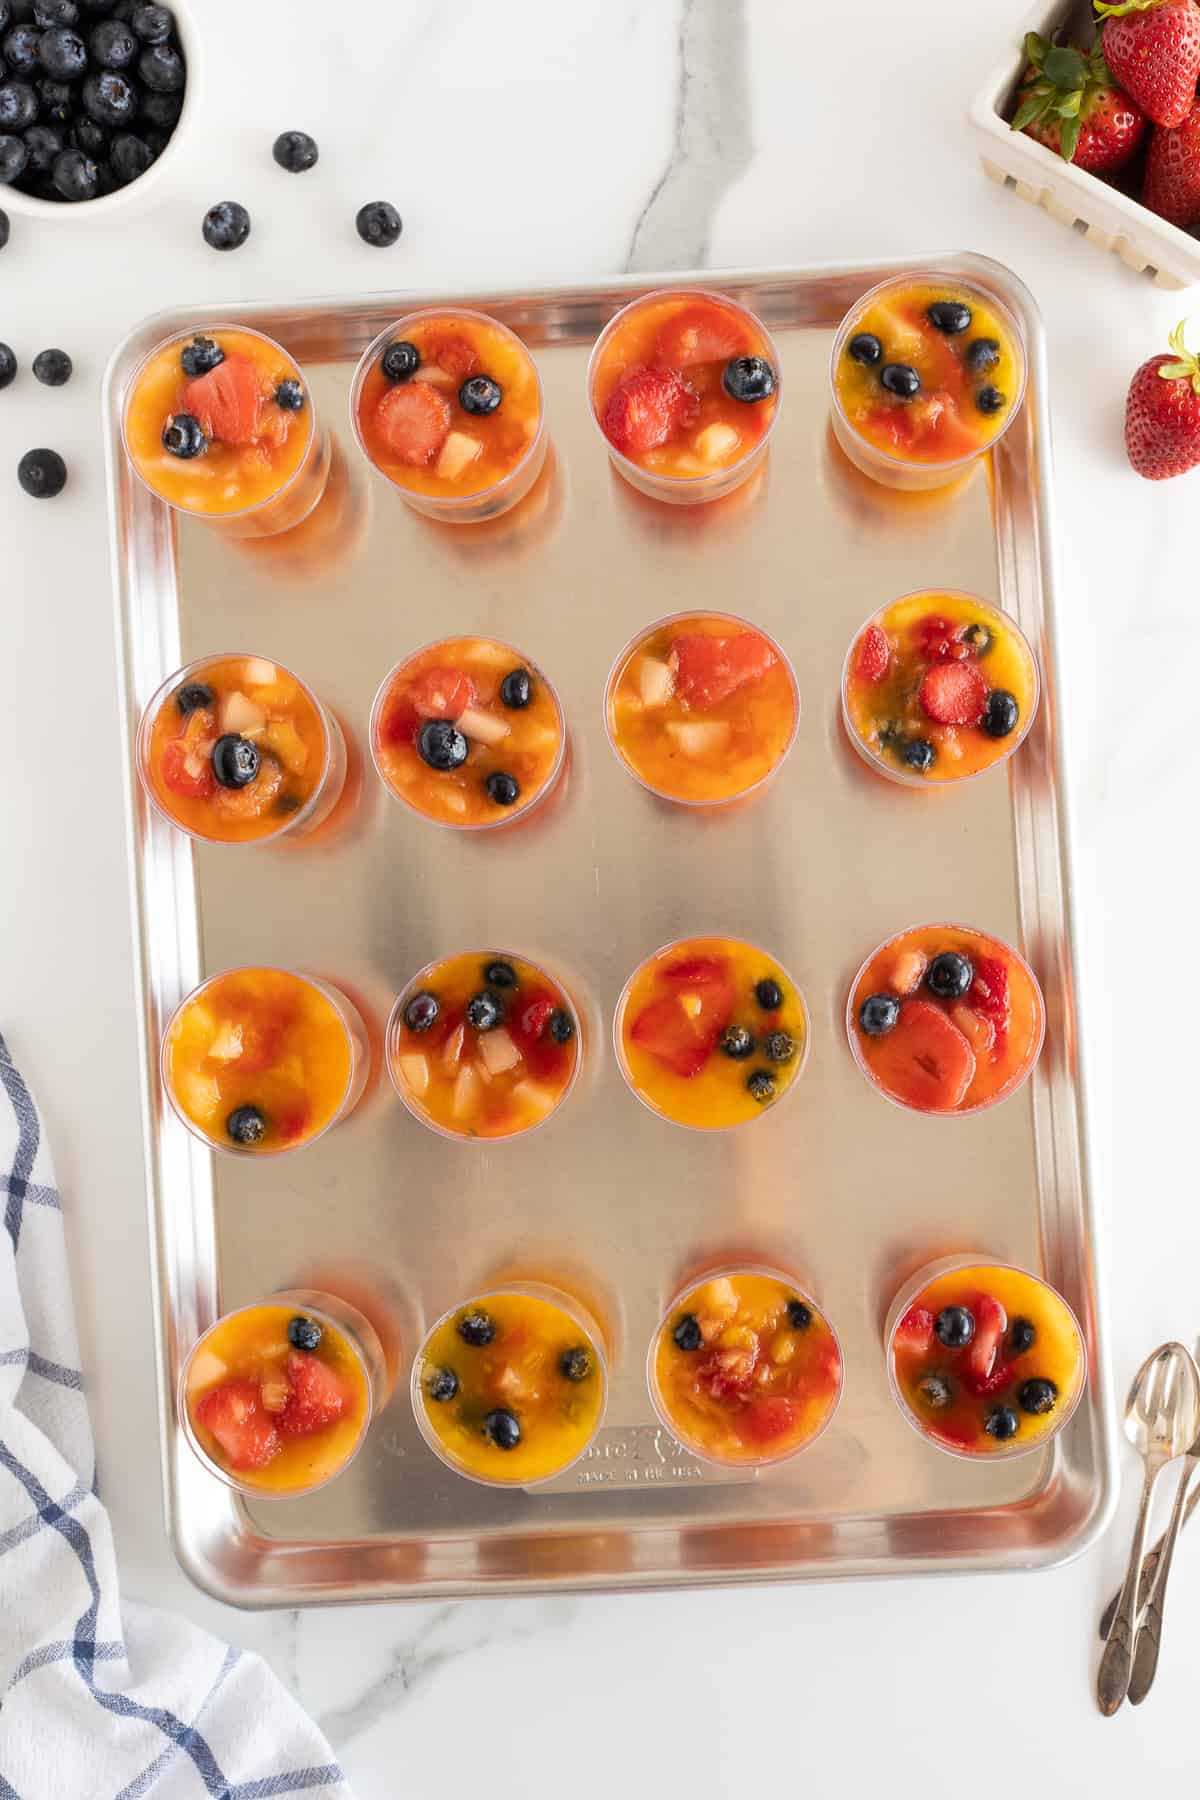
These Frozen Fruit Cups look super cute in small 5 ounce plastic dessert cups. You can also use plain plastic wine cups or foil cupcake liners for slightly smaller portions.
- Freeze – Place the cups on a rimmed baking sheet and spread the fruit and juice mixture evenly on top. Place the baking sheet in the freezer for at least 4 hours or overnight.
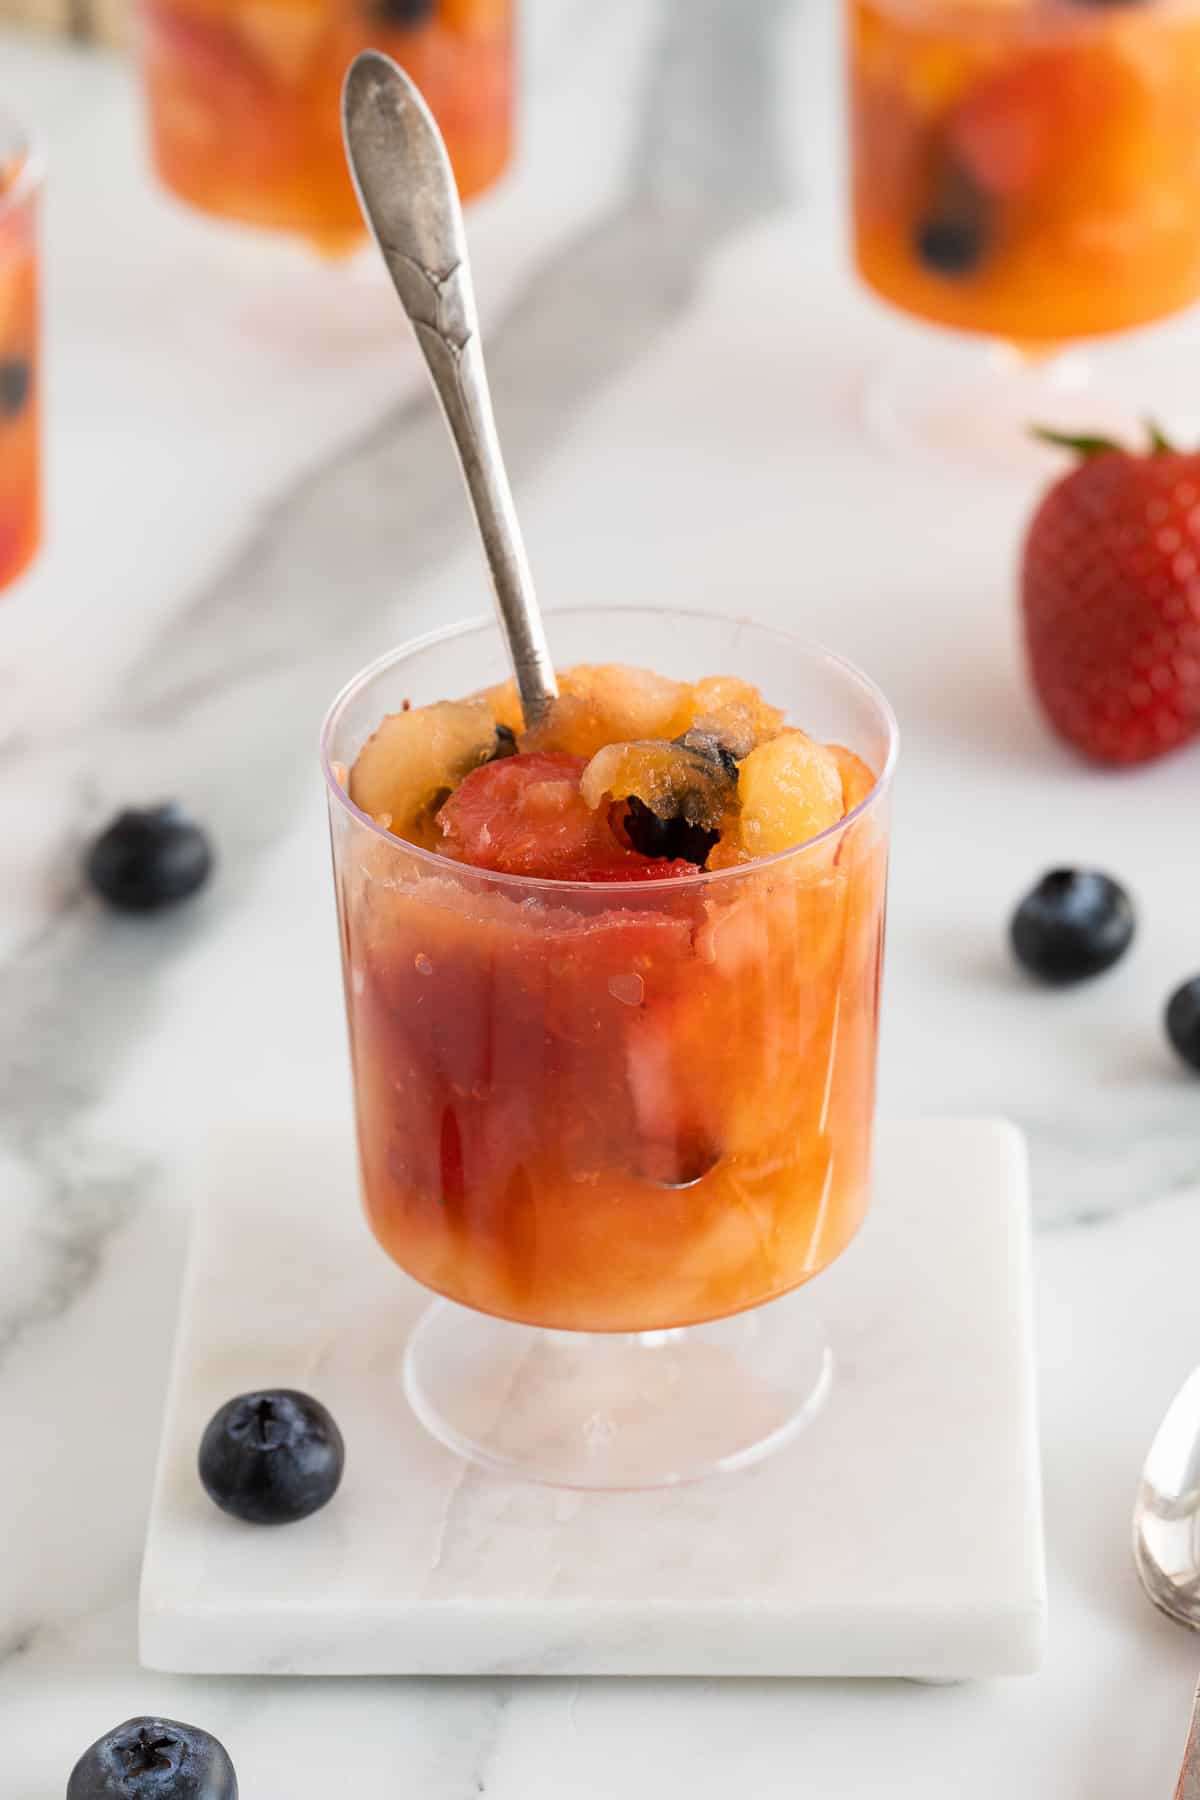
- surcharge – When ready to serve, take them out of the freezer and let them sit at room temperature for about 5 minutes to soften them up a bit.
variations
- The taste – Try different flavors of nectar like mango or peach nectar, that would be delicious
- Frozen Fruits – Mix it up with mangoes or use frozen pears instead of canned. Any type of fruit you love will work.
- Fresh fruit – Use seasonal fruits like raspberries, blackberries or small pieces of chopped kiwi for a tropical twist. Chopped bananas also taste delicious in these fruit cups.
- canned fruit – You can also use canned peaches instead of pears.
Tips for the best frozen fruit cups
- Choose fruit in a variety of different colors for the most beautiful fruit cups.
- Leave a little headspace when filling your cups as the mixture can expand slightly as it freezes.
- Place the cups on a baking sheet for easy transfer in and out of the freezer. If using foil muffin cases, place them in the wells of a muffin tin to help them hold their shape.
- Leave the fruit cup sit at room temperature Allow to soften slightly 5 minutes before serving.
- Make the frozen fruit cups a day in advance This gives them enough time to freeze solid.
More fruit side recipes you’ll love
Sign up for my free newsletter to get the latest recipes and visit me on FacebookInstagram and Pinterest for more cooking inspiration!
Frozen fruit cups
Frozen Fruit Cups are a refreshing and delicious treat that can be made any time of year. They’re easy to make, customizable, and a great choice for a holiday menu.
Ingredients
- ¾ Cup granulated sugar
- ½ Cup Water
- 2 cups apricot nectar, like Kerns
- 10 ounces frozen strawberries in syrup, thawed and drained
- 8th ounces Canned crushed pineapple in 100% juice, undrained
- 8th ounces Canned pears, drained and cut into small pieces
- ½ Cup fresh blueberries, Optional
instructions
-
Bring the sugar and water to a boil in a small saucepan. Reduce the heat and simmer until syrupy, about 10 to 12 minutes. Set aside to cool. The mixture will become more syrupy as it cools.
-
Meanwhile, mix the remaining ingredients in a large bowl. Stir in the cooled syrup.
-
Place 16 sturdy, 5-ounce plastic dessert or wine cups on a large baking sheet. Divide the fruit and juice evenly among the cups, leaving some headroom.
-
Transfer the baking sheet to the freezer. Freeze for at least 4 hours or overnight. Let stand at room temperature for 5 minutes before serving.
Remarks
Line muffin tins with aluminum baking cases and distribute fruit and juice evenly on top. Freeze as instructed in the recipe. This recipe fills about 18 baking cups.
Nourishment
Portion: 11 Cup · Calories: 79 kcal · Carbohydrates: 20 G · Protein: 0.3 G · Fat: 0.3 G · Saturated Fatty Acids: 0.02 G · Polyunsaturated fat: 0.1 G · Monounsaturated fatty acids: 0.1 G · Sodium: 3 mg · Potassium: 86 mg · Fiber: 1 G · Sugar: 18 G · Vitamin A: 428 ie · Vitamin C: 22 mg · Calcium: 10 mg · Iron: 0.2 mg
Nutritional information is automatically calculated using generic ingredients and is an estimate, not a guarantee. For more accurate results, please refer to the labels on your ingredients at home.
This post was originally published on December 24th, 2011. It has been updated with new text and images.